
How to Plaster a Wall: A Beginner’s Patch-First Guide for UK Homes
How to Plaster a Wall: A Beginner’s Patch-First Guide for UK Homes
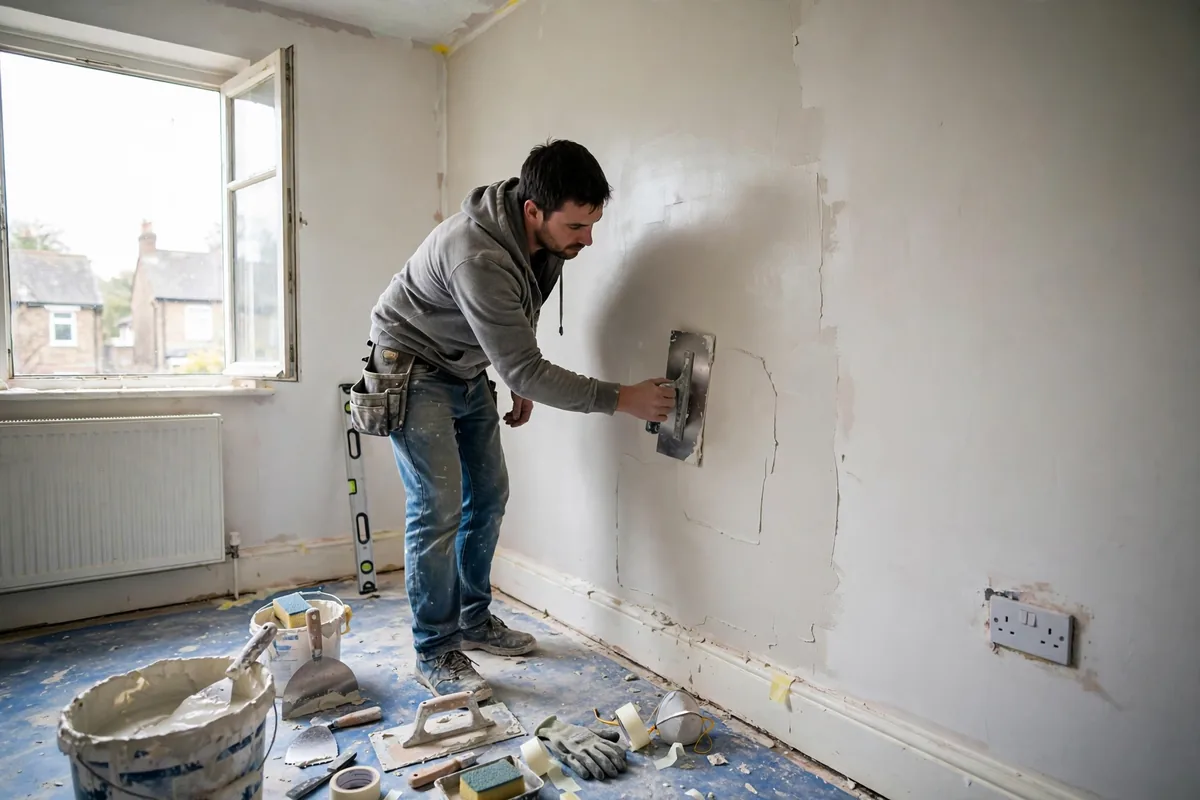
Plastering has a reputation that puts most first-timers off before they pick up a trowel. It looks like a trade secret: a plasterer floats a wall flat in minutes, the finish is glass smooth, and the whole thing seems to depend on a wrist action you either have or you do not. The truth is less dramatic. Plastering is a skill, and a full room skimmed by a beginner will show it, but the basic moves are learnable, and the fastest way to learn them is not to start on a wall. It is to start on a patch.
This guide is built around that idea. You will practise on a small repair first, where a mistake costs you an hour and a bag of plaster rather than a whole room, and only then move on to a full wall with the same steps. It covers the tools and materials you actually need, how to prepare a wall and prime it with PVA, how to mix plaster to the right consistency, the two-coat method for brick and block walls and the skim-only method for plasterboard, how long plaster really takes to dry, and how to paint it with a mist coat so the paint does not peel. It also sets out honestly where the beginner line sits, and what a plasterer charges when the job is beyond a first attempt.
Start With a Patch, Not a Wall
Every guide in the top results for this question starts with a full wall. That is the wrong place for a beginner to start, and it is the reason so many first attempts end in a wall that has to be paid for twice. Plaster sets fast. Multi-finish plaster gives you roughly 20 to 25 minutes of working time before it starts to firm up, and a first-timer covering a whole wall will still be spreading the first section while the last section is already going off. A patch, by contrast, is small enough to finish inside that window, and it teaches you every skill the wall needs: mixing, laying on, flattening, trowelling and timing.
Pick a real repair, not a practice board. A hole where a rawl plug pulled out, a dented corner, a cracked patch of old plaster, or the scar left after you took down a shelf are all ideal. A hole deeper than about 5mm needs a backing coat first, then two finishing coats; a shallow hole or a hairline crack needs only the finishing coats. If you have just stripped wallpaper and the wall underneath is damaged, that is the same job, and our guide to how to remove wallpaper without damaging walls covers getting the paper off without tearing the plaster underneath.
Before you commit to a wall, run this honest check, which the better guides agree on. Skimming plasterboard is achievable for a confident DIYer: the board is already flat, so you are only laying on a 2 to 3mm finish coat. Two-coat work on brick or block is a different job. It needs an undercoat of bonding, browning or hardwall at 8 to 11mm, keyed while firm, then a 2 to 3mm finish coat, and it needs real skill to get flat. A full room takes a first-timer at least three days; a professional does about a wall in four hours. If your wall is bare brick or block and you have never plastered before, do your patches, then get a quote. According to Checkatrade’s cost guides, last updated in June 2026, skim plastering averages about £24 per square metre and a plasterer day rate averages about £300, with a room skim typically costing £430 to £550. MyJobQuote’s guide from 2 September 2026 puts the average cost of plastering a room at £630, with skim coats at £15 to £25 per square metre and a full replaster at £30 to £40 per square metre. Those are indicative ranges, not a quote for your room, and London and the South East sit at the top of them.
There is one more gate to respect. Skimming whole rooms is a plasterer’s job, and dry-lining, fixing plasterboard to the wall with adhesive and skimming that, is the faster alternative to wet-plastering a bare brick wall. Neither changes the patch-first rule: the patch is where you find out whether you enjoy the work and whether your finish is good enough, before the stakes get high.
Work through the steps below on your patch first. If the patch dries flat, feathered at the edges and ready to paint, you are ready to think about a wall. If it does not, you have lost an evening, not a room.
Tools and Materials
Plastering needs fewer tools than most DIY jobs, but the ones it needs matter, and cheap substitutes show in the finish. Buy or borrow the right trowel before you start, because a bad trowel cannot be fixed mid-job.
You will need:
- A stainless steel plastering trowel, about 11 to 14 inches. This is the tool that does the work. A carbon steel trowel rusts and marks the plaster; a plastic trowel will not give you a flat finish. Keep it clean between mixes, and wipe it dry at the end of the day.
- A hawk, the flat square board with a handle underneath, which holds the plaster while you work. Load it from the bucket with the trowel, and keep it close to the wall so plaster does not fall.
- A clean mixing bucket, at least 15 litres, and a plasterer’s whisk on a drill, or a strong mixing stick if you are doing a very small patch. The bucket must be spotless: old plaster stuck to the sides sets fast and seeds lumps into a fresh mix.
- Multi-finish plaster, the standard finish plaster for UK interior walls. A 25kg bag covers a small patch many times over, so buy one bag and use it for your practice patches before you open a second.
- Bonding coat plaster if your patch is deeper than 5mm or you are working on brick or block. This is the undercoat that builds the depth back up before the finish coat goes on.
- PVA adhesive, diluted with water, for priming. A small bottle is enough for patches.
- Scrim tape, the self-adhesive mesh tape used over cracks and joints so they do not reappear through the finish.
- A spray bottle of clean water, for keeping the trowel and the plaster surface workable.
- Dust sheets, masking tape, a spirit level and a straight edge, a filling knife for small patches, a sponge, and a bucket of clean water for washing tools.
Wear old clothes and gloves for mixing, and safety glasses when you are raking out old plaster or working overhead. Plaster dust is fine and irritating, so a dust mask is worth wearing while you prepare the wall. Cover the floor properly: plaster that dries on carpet or floorboards is hard to remove, and drips on a skirting board will show through paint.
One thing to buy before you need it is a second clean bucket. You will use it to wash the trowel and hawk between coats, and to keep clean water separate from the mixing water. Dirty water in a mix shortens the working time and weakens the set, and it is the most common avoidable mistake in a first mix.
Prep and PVA
Plaster fails on preparation far more often than on technique. A finish coat laid on a dusty, dry or greasy wall will not bond, and it will blow, crack or peel within weeks. The preparation takes longer than the plastering on a patch, and that is normal.
Start by removing anything loose. Scrape off flaking paint and crumbling plaster with a filling knife until you reach sound material, and brush the whole area down with a stiff brush so no dust or loose crumbs remain. If you are repairing a crack, chase it out to a width of about 1 to 3mm so the repair has something to key into, then seal it and lay scrim tape over it before you plaster. Two coats of multi-finish over scrim tape will hold a hairline crack; filler alone is the quick route for a crack that is not moving, but it will show through again if the wall is still settling.
Next, deal with the surface you are plastering onto. Bare brick and block are thirsty: they suck the water out of fresh plaster before it has time to set, which leaves a weak, powdery finish. Old painted plaster is the opposite problem: it is sealed and smooth, so new plaster has nothing to grip. PVA primer solves both, but only if it is mixed and applied correctly.
The dilution the UK guides agree on is roughly one part PVA to four or five parts water. Plasterboard Hub and Supreme Merchants both give 1:4; the Sandwich Handyman guide gives 1:5. Either end of that range works. Brush or roll the diluted PVA over the whole repair area and a little beyond it, and let it go tacky, not dry. The common instruction is to plaster while the PVA is still tacky to the touch, because a fully dried PVA coat can form a skin that the plaster slides on. On very smooth or damp-prone surfaces, a grit primer such as Febond Blue Grit, or SBR, gives a better key than PVA, and it is worth using if the wall has a glossy paint finish or a history of damp. If the wall is damp, find the cause before you plaster over it: our guide to the types of damp in a house explains how to tell condensation, rising damp and penetrating damp apart, because plaster laid over a damp wall will fail whatever you prime it with.
For a patch deeper than 5mm, the preparation includes the backing coat. Fill the depth with bonding coat, leaving it about 2 to 3mm below the finished surface, and scratch it with a key while it is still firm so the finish coat has something to grip. Let the bonding coat set before you skim over it. For small holes, a coat of diluted PVA or a sealer such as Zinsser Gardz, then multi-finish feathered at the edge with a damp brush, is enough.
Check the wall is flat before you start. Hold a straight edge or a long spirit level against it and look for hollows and high spots. A patch that sits proud of the wall will catch the light forever; a patch that sits low will show as a dip. Mark the high spots with a pencil so you know where to feather the plaster out.
Mixing to the Right Consistency
Mixing is where most first patches go wrong, and the error is almost always the same: too much water, or plaster added to a dirty bucket. Get the mixing right and the rest of the job is far easier.
Always add plaster to clean water, never the reverse. Pouring water onto dry plaster makes lumps that will not mix out, and they will drag across your finish as hard spots. Start with clean water in a clean bucket, then sprinkle the plaster in by hand, letting it fall through the water until it forms a small island above the surface, then mix with the whisk until it is smooth and creamy. The figure the UK guides give is about 0.5 litres of water per kilogram of plaster, which works out at roughly 12 to 13 litres of water for a 25kg bag. That is a starting point, not a law: follow the manufacturer’s instructions on the bag, and adjust by feel.
One caution is worth stating plainly, because it appears in a major guide and it is wrong as a ratio. Which? says that “50/50 is common” for the water and plaster mix. Do not repeat that as a ratio and do not mix by it. Use the manufacturer’s instructions and the 0.5 litres per kilogram figure. Half water and half plaster by volume would give you a soup that will not stay on a wall.
The right consistency is the hardest thing to describe in words and the easiest to recognise once you have felt it. It should be like thick double cream, or soft-serve ice cream: it holds its shape on the trowel, it does not run off the hawk, and it spreads without dragging. Too stiff and it will tear and leave trowel marks you cannot flatten out; too wet and it will slump, slide down the wall and take far too long to firm up. For a first patch, mix a small amount, about a third of a bucket, so you can use it all inside the working time. You can always mix a second batch. You cannot rescue a bucket that has gone off.
Timing matters as much as consistency. Multi-finish gives you roughly 20 to 25 minutes of working time before it starts to set, and the first coat firms in about 20 minutes. That is your whole window for laying on, flattening and first trowelling. Do not add water to a mix that is going off to try to bring it back; it will weaken the set and the finish will be powdery. Throw it away and mix fresh. If you want more time, a plaster retarder such as Extratime can buy up to about 60 extra minutes, which Which? and its plasterer Ross Stagg both note, but for a patch you should not need it. Work small, work fast, and mix little and often.
Clean your tools the moment you finish a mix. Plaster sets hard on a trowel in minutes, and a trowel with dried plaster on it will scratch every pass you make afterwards. Keep the wash bucket beside you and rinse the trowel and hawk between coats.
Two-Coat Method
This is the core of the job, and it is the same on a patch and on a wall. The only difference is the size of the area and the time you have. Work through it on your patch first, then scale it up.
The first coat, laying on. Load the hawk with plaster and transfer a workable amount to the trowel. Start at the bottom of the patch or wall and work upwards, laying the plaster on in a firm, even coat with the trowel held at a slight angle. Aim for an even thickness: about 2 to 3mm for a skim on plasterboard, and 8 to 11mm of undercoat on brick or block. On brick or block, this first coat is the undercoat, bonding, browning or hardwall, and it does the levelling. On plasterboard, there is usually no undercoat at all: the board is already flat, so the skim coat is the only coat, and it goes straight on at 2 to 3mm.
Keep your passes overlapping and do not go back over an area you have already laid. Going back drags the surface and leaves marks. If you miss a spot, leave it and fill it on the next pass. Work steadily across the whole area until it is covered.
Flattening. Once the first coat is on, wait until it firms up, about 20 minutes for multi-finish, then flatten it with the trowel held almost flat against the wall, using long, even strokes. This is the pass that takes out the trowel lines and high spots. On an undercoat, scratch the surface with a key while it is firm, so the finish coat has something to grip. This is called keying, and skipping it is one of the reasons finish coats peel off undercoats.
The second coat, the finish. Mix a fresh batch of multi-finish and lay it on at 2 to 3mm over the firmed first coat. This is the coat that will be seen, so keep it thin and even. On plasterboard, this is your only coat, and it goes on the same way.
Trowelling to a finish. This is the part that takes practice, and it happens in stages as the plaster firms. First, flatten the finish coat with the trowel almost flat, taking out lines and ridges. Then, as it starts to firm, go over it again with a slightly damp trowel, using water from your spray bottle. The water lets the trowel glide and closes the surface. Finally, when the plaster is nearly set but still workable, do a last pass with a clean, damp trowel, barely touching the surface. Each pass should be lighter than the last. The common beginner mistake is to keep trowelling after the plaster has set: that tears the surface and leaves marks you cannot remove without sanding or skimming again.
Feather the edges of a patch out onto the surrounding wall with a damp brush or a flexible filling knife, so there is no hard line where the new plaster meets the old. A patch with a visible edge will show through paint, however good the centre is.
If you are moving on to a full wall after your patches, the method is identical, but the logistics change. You will need to mix bigger batches, work in sections, and keep a wet edge so one section joins the next without a line. That is why a full room takes a first-timer at least three days while a professional manages about a wall in four hours: it is not one job, it is several patches joined together at speed. If your wall is in a bathroom, the same two-coat method applies, but the surface preparation matters more, because tiles and moisture punish bad preparation. Our guide to how to tile a bathroom wall explains tanking wet areas and the weight limits that decide whether a wall can take tiles at all.
Drying Times and Mist Coat
The most common way to ruin a good plastering job is to paint it too soon. Fresh plaster looks dry long before it is dry, and paint laid on damp plaster will bubble, peel or flake within weeks.
The drying time the guides agree on is a minimum of five days in good summer conditions, and two weeks or more in other conditions. The Sandwich Handyman guide gives one to four weeks for a full wall. The only reliable test is colour: paint only when the plaster has turned pale pink throughout, with no dark patches left. Dark patches are still damp. A room with the heating on and the windows open on a dry day will dry faster, but do not force it with a direct heater or a dehumidifier pointed at the wall, because rapid drying can crack the surface.
While the plaster dries, leave it alone. Do not sand it, do not fill small trowel marks, and do not hang anything on it. Small imperfections that bother you on day one often look far less obvious once the plaster has dried to its final colour, and the ones that still show can be filled with a fine surface filler after it has fully dried.
When the plaster is fully dry and uniformly pale pink, it is ready for a mist coat. A mist coat is watered-down emulsion, roughly 50:50 emulsion to water, rolled over the whole plastered surface and left for 24 hours before you apply top coats. It soaks into the porous plaster and seals it, so the top coats sit on the surface instead of being sucked in unevenly. Which? notes that a dedicated primer is the safer option if you want to be certain, and for a bathroom or a kitchen it is worth considering, but a mist coat is the standard approach in most UK homes and it works well when the plaster is genuinely dry. Two top coats of your chosen emulsion go on after the mist coat has dried, and the wall is finished.
For more on what comes after plastering, including how to repair plaster that has already been painted or papered over, see our wallpaper and plaster repair tips.
Frequently Asked Questions
Can a beginner plaster a wall?
Yes, but start with a patch, not a wall. Skimming plasterboard is achievable for a confident DIYer because the board is already flat and you are only laying on a 2 to 3mm finish coat. Two-coat work on brick or block needs real skill, and a full room takes a first-timer at least three days against a professional’s roughly four hours a wall. Do your patches first, and if the finish is not good enough, hire a plasterer for the wall.
How much water do I mix with plaster?
Use about 0.5 litres of water per kilogram of plaster, which is roughly 12 to 13 litres per 25kg bag, and always follow the manufacturer’s instructions on the bag. Always add plaster to clean water, never the reverse. Do not mix by the “50/50” figure that appears in one major guide: that is not a usable ratio.
How long does plaster take to dry before painting?
A minimum of five days in good summer conditions, and two weeks or more otherwise, with one to four weeks for a full wall. Paint only when the plaster has turned pale pink throughout, with no dark patches. Then apply a mist coat of watered-down emulsion, roughly 50:50, leave it 24 hours, and apply two top coats.
Do I need PVA before plastering?
Yes, on most surfaces. Diluted PVA at roughly 1:4 or 1:5 with water primes thirsty brick and block so they do not suck the water out of fresh plaster, and gives smooth or painted surfaces something for the plaster to grip. Apply it while it is still tacky, not fully dry. On very smooth or damp-prone surfaces, a grit primer or SBR gives a better key.
How much does it cost to get a wall plastered professionally?
According to Checkatrade’s cost guides, last updated in June 2026, skim plastering averages about £24 per square metre, a plasterer day rate averages about £300, and skimming a room typically costs £430 to £550. MyJobQuote’s guide from 2 September 2026 puts the average cost of plastering a room at £630, with skim coats at £15 to £25 per square metre and a full replaster at £30 to £40 per square metre. Those are indicative ranges, not quotes, and prices are higher in London and the South East.
How thick should plaster be?
On brick or block, the undercoat of bonding, browning or hardwall goes on at 8 to 11mm, keyed while firm, then a finish coat of multi-finish at 2 to 3mm. On plasterboard, the skim coat alone is 2 to 3mm and there is usually no undercoat. Holes deeper than 5mm need a backing coat first, then two finishing coats.