
How to Tile a Bathroom Wall: A Beginner’s UK Guide
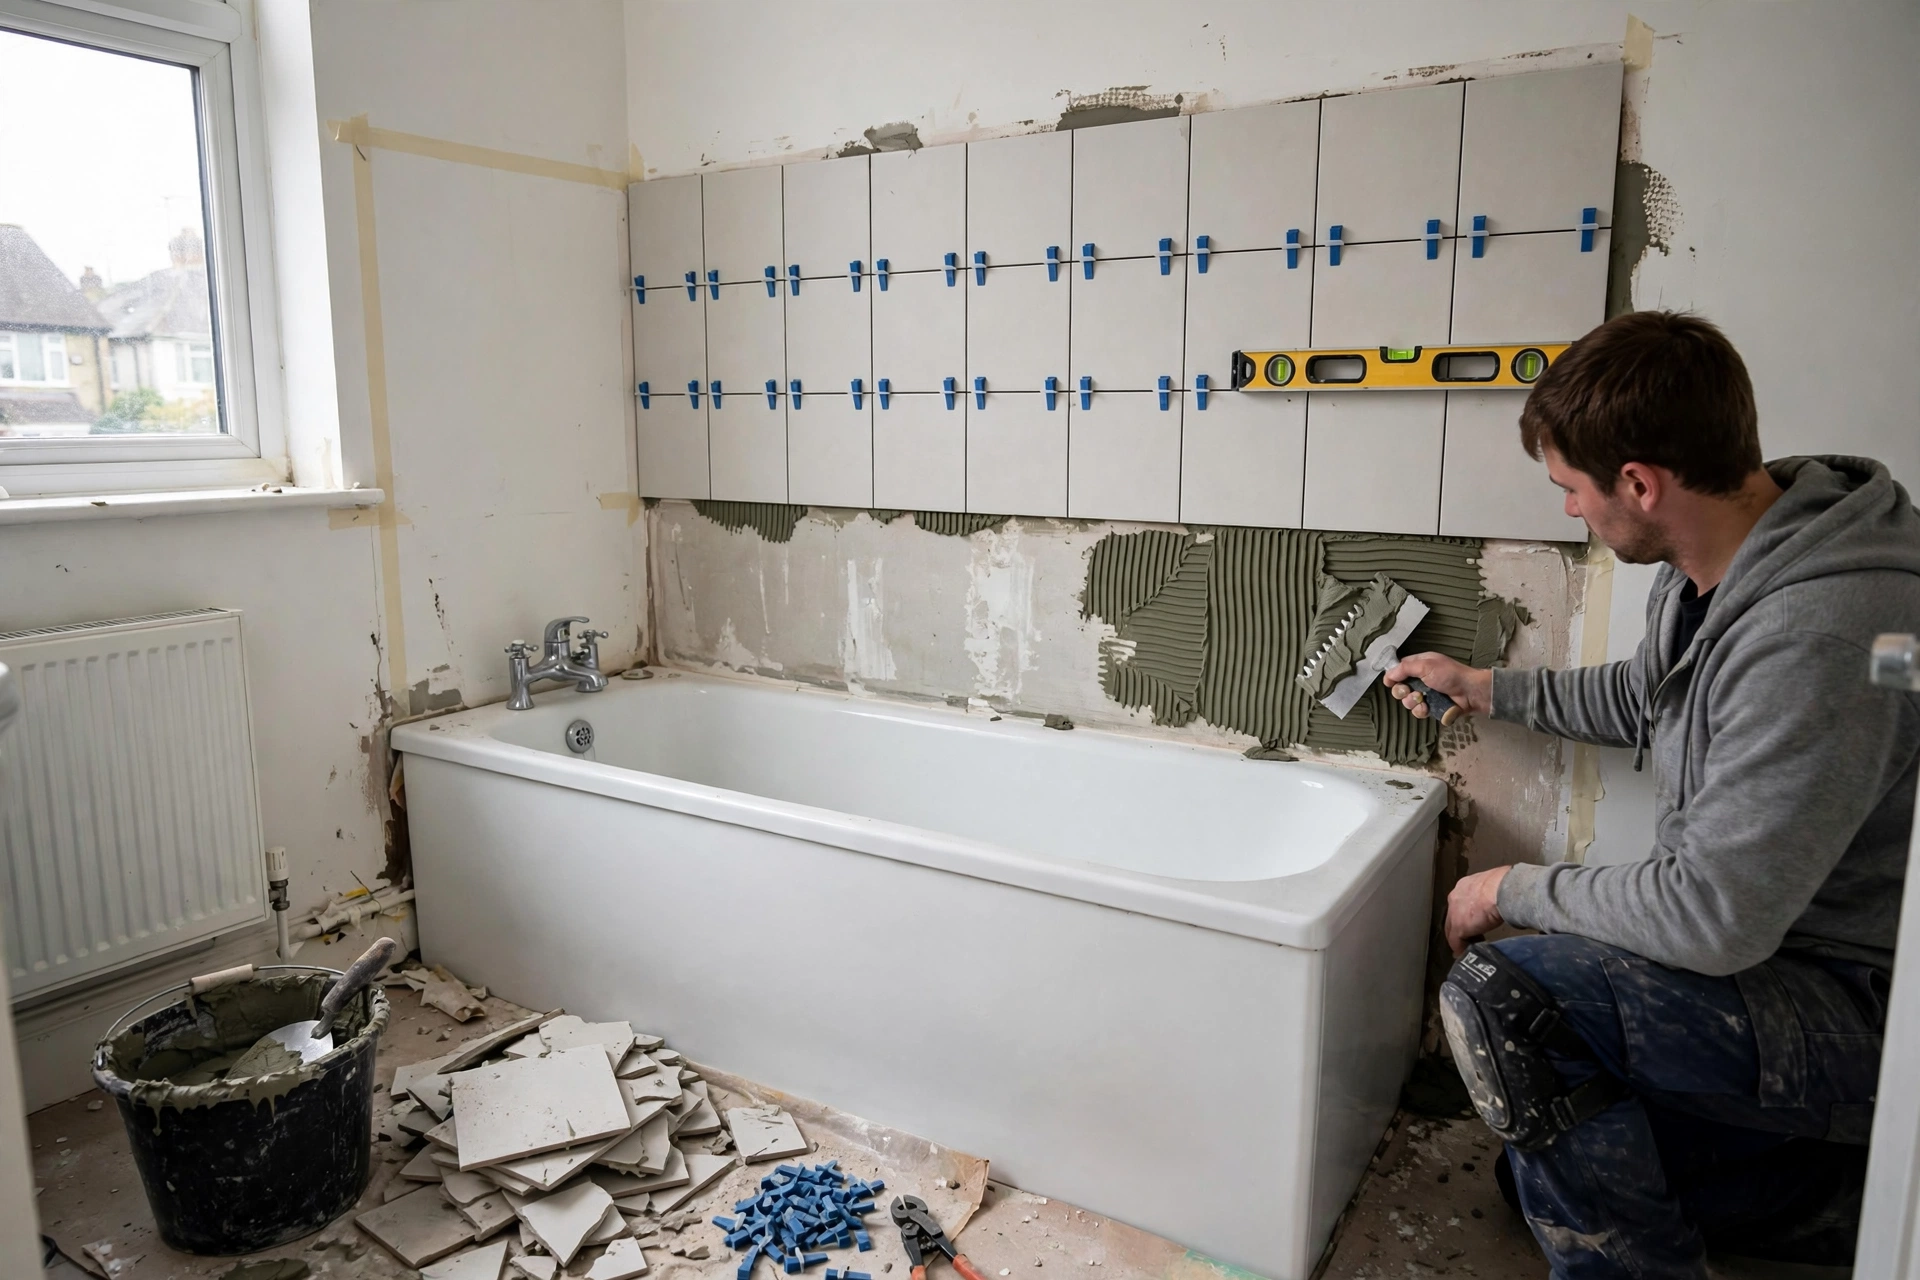
Tiling a bathroom wall looks simple from the outside. You stick tiles to a wall, fill the gaps, and step back. In practice, the difference between a bathroom that looks professionally finished and one that looks tired within a year is almost never the tile itself. It is the preparation underneath it, the weight the wall can actually carry, the waterproofing in the wet zones, and the setting out that decides where every cut falls before the first tile goes up.
This guide follows the job in the order a good tiler does it: plan and measure, prepare the surface and check its weight limit, tank the wet areas, set out, fix the tiles, cut around fittings, grout and seal, and finally the beginner mistakes that ruin otherwise careful jobs. It is written for a first-time DIY tiler working on a standard UK bathroom wall. Floor tiling is a separate job with different falls, drainage and weight considerations, and it is not covered here.
Plan and Measure
Start with the wall, not the tile shop. Measure the height and width of each wall you plan to tile, in metres, and multiply them to get the area in square metres. A wall 2.4 metres wide and 2.1 metres high is 5.04 square metres. Do this wall by wall, because bathrooms are rarely simple rectangles once you allow for a bath panel, a window reveal, a boxing-in section around pipes, and the area behind a basin or toilet that may not need tiling at all. Sketch each wall on paper, mark the obstacles on it, and write the measurements on the sketch. That sketch becomes your cutting plan later, and it stops you from ordering tiles for a wall you never intended to tile in full.
Order 10 percent more tile than your measured area. This is the standard wastage allowance, and it is not padding. You will lose tiles to cuts at edges, around pipes and sockets, and to the occasional tile that chips when it is cut or dropped. A patterned or brick-bond layout needs more, not less, because every offset row creates an offcut that may not fit anywhere else. If you are tiling a shower wall with a niche or several fittings, allow 15 percent. It is far better to have a spare box at the end than to run short by half a box and discover that the next batch is a slightly different shade.
Batch numbers matter more than most beginners expect. Tiles from different production batches can differ in shade, size and glaze tone, even when the product name and colour are identical. Check the batch or shade number on every box before you open them, and make sure they all match. If a box is from a different batch, set it aside and return it, or use it on a separate wall where a tiny shade difference will not sit next to the main run. Mix tiles from several boxes as you work, taking one tile from each open box in turn, so that any small variation within a batch is spread across the wall rather than concentrated in one patch.
Choose the tile with the wall in mind, not just the look. Wall tiles are thinner and lighter than floor tiles, and that matters because of the weight limits in the next section. Large-format tiles look calm and modern, with fewer grout lines, and they suit a small bathroom for exactly that reason, as our guide to small bathroom renovation ideas explains. But large tiles are harder to cut neatly, harder to keep flat on a wall that is not perfectly true, and heavier per tile, so they are a harder first project than a standard 200 by 300 millimetre or 300 by 600 millimetre ceramic tile. Porcelain is denser, harder and heavier than ceramic, and it needs a diamond blade to cut cleanly. For a first wall, a standard ceramic wall tile in a size you can handle comfortably is the sensible choice.
Before you buy anything else, list the materials and tools you will need so the job is not interrupted halfway through a wall of wet adhesive. You need tile adhesive suitable for the tile and the surface (ready-mixed tub adhesive for ceramic wall tiles on a sound wall, powdered cement-based adhesive for porcelain, large tiles or wet areas), grout suitable for bathrooms, primer if the surface needs it, tanking kit for wet zones, spacers, a notched trowel of the size the adhesive maker specifies, a spirit level, a tile cutter, a tile file, a sponge, a grout float, and a gauge stick, which is simply a straight batten marked with tile and joint widths. Add masking tape, dust sheets, a pencil, and a tape measure. Buy the adhesive and grout in the quantities the makers state for your area, plus a little extra, because running out of adhesive with half a wall fixed is how rows drift out of level.
Finally, decide what a professional would cost before you decide to do it yourself, so the decision is honest. UK guides checked in November 2026 put a tiler’s labour at roughly £20 to £40 per square metre for standard wall tiles, according to MyJobQuote’s bathroom tiling guide updated in September 2026, with a day rate of about £200 to £350 in Checkatrade’s tiling cost guide updated in June 2026. Supplied and fitted, MyJobQuote puts ceramic wall tiles at about £60 to £90 per square metre and porcelain at about £70 to £100 per square metre, while Checkatrade’s all-in average for standard tiles, materials and labour is about £110 per square metre. London and the South East cost more. These are typical guide ranges, not quotes, and your price depends on tile size, pattern, preparation and access. If your wall needs tanking, backer board, or old tiles removed, the preparation alone can cost as much as the tiling.
Prepare the Surface, and Check It Can Take the Weight
No tile job survives a bad surface. Tiles are only as flat, as strong and as waterproof as what they are stuck to, and adhesive cannot compensate for a wall that moves, crumbles or sheds its surface. Start by stripping the wall back to a sound base. Remove old tiles, loose paint, flaking plaster and wallpaper. Scrape off any soft or blown plaster, the hollow-sounding patches that have lost their bond to the brickwork behind them. Fill small holes and cracks with a suitable filler, let it dry fully, and sand it flat. The wall does not need to be perfect, but it does need to be solid, dry, clean and reasonably flat. Hold a long spirit level or straight edge against the wall in several places. Gaps of more than a few millimetres over a metre will show as lipping, where one tile edge sits proud of its neighbour, and they need levelling compound or a skim before you tile, not extra adhesive afterwards.
Painted walls need care. Tiles will not bond reliably to gloss paint, and even matt emulsion can peel under the weight of a tiled wall if it was not keyed. Score a glossy surface or remove it, and prime a painted wall with a primer the adhesive maker recommends for that surface. New plaster is the opposite problem: it looks ready long before it is. Fresh plaster needs to dry fully, usually at least four weeks for a full skim, and it needs a primer coat, because dry plaster sucks the moisture out of adhesive before it can cure and leaves a weak bond. Never tile directly onto a dusty, chalky or damp surface. Brush it down, prime it if the adhesive maker says to, and let the primer dry.
Now the check that beginners most often skip, and that causes the most expensive failures: the weight limit of the wall. A tiled wall is heavy. The limit is not the tile alone, but tile plus adhesive plus grout together, measured in kilograms per square metre. The figures used across UK tiling guidance are 20 kilograms per square metre on a plastered wall, and 32 kilograms per square metre on plasterboard. Some cement backer boards carry more, and the board maker’s own figure is the one to use if you fit one. To check your choice, add up the weight per square metre of your tile (the supplier or box states it, or you can weigh one tile and divide by its area), plus roughly 3 to 4 kilograms per square metre for adhesive and grout. If the total is above the limit for your wall, you have three honest options: choose a lighter tile, replace the plasterboard with a suitable tile backer board, or tile a smaller area and paint the rest. What you cannot do is hope the wall holds. A wall that is overloaded does not fail on day one. It fails months later, when tiles start to drum hollow, crack, or come away in sheets, usually in the shower where water gets behind them.
Where the surface is unsuitable in itself, the fix is to change the surface, not the adhesive. Plasterboard that is soft, damp or flexing should be replaced with a tile backer board in wet areas. A wall with active damp should be diagnosed and fixed before it is tiled over, because tiling over damp hides the problem and traps moisture behind an impermeable layer. If a bathroom wall smells musty, shows dark patches, or has paint that keeps bubbling, find the cause first. Our guide to types of damp in a house explains how to tell condensation, rising damp and penetrating damp apart, because each needs a different fix and none of them is fixed by covering it with tile.
One more preparation point saves more jobs than any other: protect everything you are not tiling. Mask the bath edge, the basin, the window frame and any fittings you are tiling around. Lay dust sheets over the bath and the floor. Tile adhesive and grout are hard to remove once they have set on enamel, chrome or a wooden floor, and a dropped tile can chip a bath in a second. Take the time to protect the room before the first trowel of adhesive is mixed.
Tanking Wet Areas
Tanking is the waterproofing layer applied to the wall before tiling in wet zones, and it is the single biggest gap between retailer guides and a bathroom that stays dry. Tiles and grout are water resistant, not waterproof. Water gets through grout joints, through hairline cracks, and around fittings, and if the wall behind the tiles is plaster or standard plasterboard, that water soaks in, softens the board, feeds mould, and eventually loosens the tiles. Tanking stops that. It is a liquid membrane, usually a primer plus a waterproof coating, sometimes with reinforcing tape at corners and joints, that turns the wall surface itself into a waterproof barrier before a tile ever goes on.
Tank every wall area that gets direct, regular water: the shower enclosure from floor to at least above the shower head, the wall above and around a bath where a shower is used over it, and the wall immediately behind and beside a basin or bidet where splashing is constant. In a walk-in shower or wet room, tank the whole shower area including the floor-to-wall junction, and follow the tanking system maker’s instructions for corners, pipe penetrations and the junction with the tray or former. A single coat is not a system. Apply the primer, the membrane coats at the thickness and drying times the maker states, and the reinforcing tape at internal corners, external corners and around pipe entries, because corners and penetrations are where membranes fail.
Tanking is not a substitute for a suitable board. In a shower, the best practice is a cement-based tile backer board plus tanking, because even a tanked plasterboard wall is a weaker starting point than a board designed to get wet. If you are tiling over existing plasterboard in a shower and it is sound and dry, tank it thoroughly and accept that you are relying on the membrane. If the board is already soft, swollen or mouldy, replace it. No membrane will save a board that has already failed.
Let the tanking cure fully before you tile over it, and do not puncture it afterwards. Every screw, rawlplug or fitting fixed through a tanked wall after tiling is a hole in the waterproof layer, so plan where shower fittings, grab rails and accessories will go before you tank, and seal around any penetration with the system’s sealant. The same rule applies to the grout and sealant at the end of the job: the silicone seal where tile meets bath, tray or basin is part of the waterproofing, not a cosmetic finishing touch, and it needs replacing when it fails rather than being painted over.
If all of this sounds like a lot of work for a wall that will be covered in tile anyway, that is the point. The tiles are the visible finish. The tanking is the part that decides whether the bathroom is still sound in ten years. Retailer guides that show a shower wall being tiled straight onto plasterboard without mentioning tanking are showing you the easy half of the job.
Set Out: Centre Line, Datum, Battens and Gauge Stick
Setting out is deciding where every tile will sit before you fix any of them, and it is the step that separates a neat wall from one with a sliver of tile at one edge and a full tile at the other. Do it dry, with the gauge stick and a pencil, before you open the adhesive.
Find the centre line of the wall first. Measure the width, mark the centre, and draw a vertical line there with a spirit level. That line is your starting point, not the corner. Starting from a corner guarantees that any unevenness in the wall width ends up as a narrow cut at the far edge, which looks wrong and is hard to cut cleanly. Starting from the centre means the cuts at both edges are roughly equal, and the wall looks balanced.
Next, find the datum, the horizontal line that the first full row of tiles will sit on. The datum is usually not the floor or the bath edge, because floors and baths are rarely perfectly level. Instead, measure up from the lowest point of the bath or floor, allow for the tile height plus one joint, and draw a level line around the wall at that height. Everything above the datum is tiled first, in full rows. The bottom row, the cut row that meets the bath or floor, is fitted last, cut to fit the actual gap, which varies if the bath or floor is slightly out of level. This is why the bottom row is always the cut row, and why a wall tiled from the floor upwards so often ends up with a sloping top edge.
Fix a horizontal batten along the datum line, screwed or temporarily fixed to the wall, checked with a spirit level along its full length. The first row of tiles sits on the batten, so it cannot slip down while the adhesive sets. A second batten, or a vertical batten along the centre line, helps on a first job, but the horizontal batten is the essential one. Mark the gauge stick with the tile height plus one grout joint, repeated along its length, and use it to check the vertical layout: how many full rows fit between the datum and the ceiling or the top of the tiling, and how wide the final cut row at the top will be. If the top row would be a sliver less than half a tile wide, adjust the datum up or down by half a tile so the top and bottom cut rows are both a sensible width. The same check applies horizontally from the centre line: if the edge cuts would be slivers, shift the centre line by half a tile.
Mark the positions of fittings on the wall before you start fixing. Pipes, shower valves, basin brackets and socket positions should be marked on the setting-out sketch and on the wall, so you know which tiles need cutting and where the cuts fall. A cut that lands in the middle of a tile is manageable. A cut that lands on a tile edge or a grout joint is not, and it is far easier to shift the layout by a few centimetres at the setting-out stage than to re-cut a tile that has already been fixed.
Fix Tiles
With the battens fixed and the layout marked, mix or open the adhesive and work in small areas, about one square metre at a time, so the adhesive does not skin over before the tiles go on. Spread the adhesive with the flat side of the trowel first, then comb it with the notched side, holding the trowel at roughly 45 degrees, to leave even ridges. The notch size matters: too small a notch leaves too little adhesive under a large tile, and too large a notch leaves adhesive squeezing into the joints. Use the size the adhesive maker specifies for your tile size and surface, and back-butter large-format tiles, spreading a thin layer on the back of the tile as well, so there are no voids behind them. Voids behind a tile are hollow spots that crack under impact and let water sit behind the tile in a shower.
Press each tile firmly into the adhesive with a slight twist, so the ridges collapse and the tile beds evenly. Place spacers at the corners, one at each joint, and check each row with a spirit level as you go, both horizontally along the row and vertically across several rows. Do not rely on the spacers alone to keep the wall level. Spacers keep the joint width even, but they do not stop a row from drifting if the batten was not level or the adhesive was spread unevenly. Check every second row, and correct a tile while the adhesive is still workable. Once adhesive has set, a tile that is out of level can only be fixed by removing it, which risks damaging its neighbours.
Work upwards from the datum batten, row by row, and work across the wall from the centre line outwards, so the cut tiles end up at the edges where they belong. Keep the joints clean as you go. Adhesive squeezed into a joint will show through the grout as a hard ridge or a colour difference, so scrape excess adhesive out of the joints with a spacer or a small tool before it sets, and wipe the tile faces with a damp sponge before the adhesive dries on them. Leave the wall alone once a section is fixed. Tiles that are nudged, leaned on or loaded while the adhesive cures will move, and the movement will not be visible until the grout goes in and the joints tell the story.
Let the adhesive cure for the time the maker states, usually at least 24 hours for a wall, before you grout or remove the battens. Removing the battens early, or grouting over adhesive that has not cured, puts load on a bond that is not yet at full strength. When you do remove the battens, fill the screw holes and fit the bottom cut row last, cut to the actual gap between the last full row and the bath or floor, with a small gap at the bottom that will be sealed with silicone rather than grout, because the junction between tile and bath or floor moves and grout there will crack.
Cut Around Fittings
Cutting is where most first-time tilers lose confidence, and most of the anxiety is unnecessary. The rule is simple: measure twice, cut once, and cut the tile before you need it, not while adhesive is drying on the wall. For straight cuts, a manual tile cutter scores the glazed face and snaps the tile along the score. It is fast, clean and dust-free for ceramic tiles, and it is the right tool for most edge cuts. For porcelain, large tiles, or any cut that is not a straight line, a wet diamond cutter gives a cleaner edge, but it needs water, eye protection, and practice on an offcut first. Keep offcuts for practice. Every new cutter, blade or tile type behaves slightly differently, and one practice cut is worth more than any amount of advice.
For pipes, the usual method is to mark the pipe position on the tile, drill a hole with a diamond hole saw of the right diameter, and then cut a straight slot from the edge of the tile to the hole if the pipe is already fixed and the tile cannot be slipped over it. The two halves, or the tile with the slot, are fixed either side of the pipe, and the joint is hidden by the pipe collar or escutcheon. For a shower valve or a basin bracket, the same principle applies: mark the fitting on the tile from the setting-out measurements, double-check the measurement from a fixed reference point such as the centre line or the datum, and cut on a stable surface, not balanced on the bath edge.
Curved or irregular cuts, around a soil pipe boxing or an arch, are done by nibbling small pieces with tile nippers and finishing the edge with a tile file, or by cutting a series of straight cuts with a wet cutter and filing to the curve. The edge will be hidden by a trim, a collar or sealant in most cases, so a filed edge that is neat but not perfect is good enough. What matters is that the tile fits without being forced. A tile that has to be hammered or wedged into place is under stress, and it will crack later, often after grouting when it can no longer be replaced without disturbing its neighbours.
Safety is not an optional extra here. Tile cutting produces sharp edges and, with power cutters, fine dust. Wear eye protection for every cut, gloves when handling cut tiles, and a dust mask when cutting porcelain or using a dry cutter. Cut tiles have edges like broken glass, and a cut tile left face down on a bath will scratch the enamel. Keep cut tiles on a towel or a piece of cardboard until they are fixed.
Grout and Seal
Grouting is the step that makes a tiled wall look finished, and it is also the step that is most often rushed. Wait until the adhesive has fully cured, then remove all the spacers, clean out any adhesive left in the joints, and brush or vacuum the dust out. Mix the grout to the consistency the maker states, thick enough to hold its shape but workable enough to push into the joints. A grout that is too wet shrinks, cracks and washes out. A grout that is too dry will not fill the joint fully and leaves voids that collect water and mould.
Work the grout into the joints diagonally across the tiles with a grout float, pressing it in firmly so every joint is full, then scrape the excess off diagonally so you do not pull grout back out of the joints. Let it firm up for the time the maker states, usually 15 to 30 minutes, then wipe the tile faces with a damp, well-wrung sponge, rinsing it often. Wipe diagonally, not along the joints, and do not flood the wall with water, because excess water weakens the grout surface and causes colour variation. A second light wipe once the grout has firmed further removes the haze. If a haze remains after the grout has cured, a grout haze remover used as directed will clear it, but it should not be needed if the first wipes were done properly.
Choose the grout for a bathroom, not just for colour. A bathroom grout should be water resistant and mould resistant, and in a shower a grout with added polymer or an epoxy grout gives a harder, less porous joint, at the cost of being harder to apply and clean. Standard cement grout is fine for walls outside the direct shower spray, provided it is sealed. Sealing the grout, once it has cured fully, with a grout sealer helps it resist staining and mould, and it is worth doing in a bathroom even when the grout maker calls it optional. It does not make grout waterproof, and it does not replace tanking, but it does make cleaning easier and slows the discolouration that makes old bathrooms look tired.
The final seal is silicone, not grout, at every junction where the tiled wall meets something that moves or is a different material: where tile meets bath, shower tray, basin, worktop, window frame, or an internal corner where two walls meet. Cut the nozzle to the joint width, apply a smooth bead, tool it with a wet finger or a profiling tool, and remove the masking tape while the silicone is still wet. Grout in these junctions cracks because the bath flexes when it is filled, the tray moves slightly, and the walls expand and contract. Silicone flexes with that movement. A bathroom where the bath edge has been grouted instead of sealed will show a cracked line within months, and water will find that crack.
Let everything cure before the bathroom is used properly. Grout needs at least 24 hours, silicone needs the time its maker states, usually 24 hours, and the shower should not be used until both have cured. It is frustrating to wait after days of work, but using a shower over uncured grout and silicone washes grout out of the joints and leaves a seal that never bonds properly.
Beginner Mistakes That Ruin Jobs
Most failed bathroom tiling jobs fail in the same handful of ways, and every one of them is avoidable at the planning stage.
The first is tiling over a surface that cannot take the weight. A heavy porcelain tile on skimmed plaster, a large-format tile on old plasterboard, or a tile fixed with the wrong adhesive for its weight, all end the same way: tiles that drum hollow, crack, or fall. Check the 20 and 32 kilogram limits before you buy the tile, not after it is on the wall.
The second is skipping tanking in the shower. Tiles and grout look waterproof, so it is easy to believe they are. They are not. A shower wall tiled without tanking may look perfect for a year, then show mould at the grout lines, soft plasterboard behind the tiles, and a leak into the room below or next door. Tanking is invisible work, and it is the work that matters most.
The third is starting in the corner and ending with a sliver. A wall that starts with a full tile at one corner and ends with a 20 millimetre strip at the other looks wrong from the doorway, and that strip is almost impossible to cut cleanly. Set out from the centre, check both edge cuts, and adjust by half a tile if you need to.
The fourth is tiling the bottom row first. Floors and baths are not level, and a wall tiled upwards from an unlevel base ends up with a sloping top edge that cannot be fixed without removing the wall. Use a datum and a batten, tile downwards to the bath or floor last, and cut the bottom row to fit.
The fifth is using the wrong adhesive or grout for the job. Ready-mixed tub adhesive is convenient for ceramic wall tiles in a dry area, but it is not the right choice for porcelain, for large tiles, for wet areas, or for a surface that needs a cement-based adhesive. Read the adhesive maker’s guidance for your tile type, size and surface, and follow it. The same applies to grout: a standard grout in a power shower, or an unsealed grout in a bathroom that is used daily, will discolour and mould far faster than a grout chosen for the job.
The sixth is rushing the cure times. Grouting over uncured adhesive, using the shower over uncured grout and silicone, or removing battens before the adhesive has set, all weaken bonds that cannot be strengthened afterwards. The cure times on the tub are not suggestions. They are the difference between a wall that lasts and one that needs redoing.
The seventh is grouting the bath edge instead of sealing it. Grout cracks where tile meets bath, tray or basin, because those junctions move. Silicone is the only correct finish there, and it needs replacing every few years as part of normal bathroom maintenance, not when it has already failed and water is getting behind the tiles.
If you recognise your wall in any of these mistakes before you start, you have already saved the job. Fix the surface, tank the wet zones, set out from the centre, use a datum and a batten, choose the adhesive and grout for the actual tile and area, respect the cure times, and seal the moving junctions with silicone. Do those things, and a first-time tiling job can look like a professional one, because in most cases it is exactly what a professional does, just more slowly and with more checking.
Frequently Asked Questions
Can a beginner tile a bathroom wall?
Yes, on a sound, flat wall with a standard ceramic tile, provided you set out from the centre, use a datum and batten, and respect adhesive and grout cure times. A shower wall that needs tanking and backer board, a large-format porcelain tile, or a wall that is out of true is a harder first job, and getting a tiler for that wall while you tile the simpler walls is a sensible compromise.
Do I need to tank a bathroom wall before tiling?
Yes, in wet zones: the shower enclosure, the wall around a bath used with a shower, and walls that get regular direct splashing. Tiles and grout are water resistant, not waterproof, and tanking is the membrane that stops water reaching plaster or plasterboard behind the tiles.
How much weight can a plasterboard wall take when tiled?
About 32 kilograms per square metre including tile, adhesive and grout, and about 20 kilograms per square metre on a plastered wall, under UK tiling guidance. Check your tile weight per square metre and add roughly 3 to 4 kilograms per square metre for adhesive and grout. If the total is over the limit, choose a lighter tile or fit a suitable tile backer board.
How much does it cost to get a bathroom wall tiled in the UK?
As a typical guide range, labour is about £20 to £40 per square metre for standard wall tiles (MyJobQuote, September 2026), with ceramic tiles supplied and fitted at about £60 to £90 per square metre and porcelain at about £70 to £100 per square metre. Checkatrade’s all-in average is about £110 per square metre including standard tiles, materials and labour, with a day rate of £200 to £350. These are guide ranges, not quotes, and preparation, tile choice and location change the price.
Should I tile from the floor up or from a batten down?
From a batten. Mark a level datum line, fix a batten along it, tile upwards from the batten, and fit the bottom cut row last, cut to fit the actual gap to the bath or floor. Tiling from the floor up copies any unevenness in the floor or bath into every row above it.
Can I tile over existing tiles?
Sometimes, but it is rarely the best choice for a first job. The existing tiles must be sound, flat and firmly bonded, the combined weight must stay within the wall limit, and the surface needs a suitable primer and adhesive. In a shower, tiling over old tiles also hides whatever condition the wall behind them is in. Removing the old tiles and starting from a sound surface gives a more reliable result.
How long should I wait before grouting and using the shower?
Let tile adhesive cure for at least 24 hours before grouting, let grout cure for at least 24 hours before heavy use, and let silicone sealant cure for the time its maker states, usually 24 hours, before the shower is used. Always follow the specific product instructions, because cure times vary by product and temperature.
What is the best grout for a bathroom wall?
A water-resistant, mould-resistant grout made for bathrooms, sealed once cured. In a shower, a polymer-modified or epoxy grout gives a harder, less porous joint. Seal the grout after curing to slow staining and mould, and finish all moving junctions, tile to bath, tray or basin, with silicone, not grout.