
How to Lay Laminate Flooring: A Beginner’s Step-by-Step Guide
How to Lay Laminate Flooring: A Beginner’s Step-by-Step Guide
Laminate flooring is the most forgiving floor a first-timer can fit. The boards click together without glue or nails, the tools are basic, and a single average room usually takes one to two days. What catches beginners out is not the clicking together. It is the planning that comes before it: boards that have not acclimatised, a subfloor that was never levelled, underlay chosen at random, and the last row ending up a 20mm sliver that looks wrong and splits within a year.
This guide follows the order that avoids those traps. Plan the layout first, then acclimatise the boards, then prepare the subfloor and choose the underlay to match it, then lay the floor, cut around doors and pipes, and finish with trims. It is written for a first-timer laying a standard click-lock laminate floor in a UK home, and it flags every point where the big retailer guides disagree, so you can see which rule is settled and which one is a judgement call.
Plan the Layout Before You Open a Pack
Most laminate mistakes are decided before the first board goes down. Laminate runs in rows, and the rows have to end sensibly at the far wall. If you start laying without measuring, you can reach the last row and find it needs to be 20mm wide. A strip that narrow is hard to click in, it looks wrong, and it is the first piece to lift.
Measure the room first. Work out how many full rows of boards fit across the width, and how wide the last row will be. MyJobQuote’s guide gives the rule to aim for: plan so the last row is at least 60mm wide. If the maths leaves a last row narrower than that, trim the first row down instead, so the shortfall is split between the first and last rows and both end up a sensible width.
Decide the direction while you are measuring. The usual advice is to run the boards along the longest wall, with the long joints running towards the main light source, usually the largest window, so the joints are less visible. In a hallway, run the boards along the length of the hall. Laying across a narrow room makes it feel narrower, and it means far more cuts.
Also plan the stagger before you start. End joints in neighbouring rows must not line up, or the floor looks like a brick wall laid by someone in a hurry and the joints become weak points. Howarth Timber and MyJobQuote both give the same minimum: the offcut used to start a new row should be at least 300mm long. Keep the offcut from the end of one row and use it to start the next, and the stagger takes care of itself.
Finally, work out how much flooring to buy. Measure the room in square metres, add 10 percent for cuts and waste, and round up to whole packs. Awkward rooms with bay windows, alcoves and doorways waste more, so allow 12 to 15 percent there. Our guide to the types of flooring compared, laminate vs vinyl vs wood puts laminate material at roughly £10 to £25 per square metre, which is the figure to use when you are costing the job, before underlay, trims and tools.
Tools and materials to have ready before you start: laminate packs, underlay, spacers, a tapping block, a pull bar, a pencil, a tape measure, a square, a utility knife, a saw (a handsaw works, a jigsaw is faster for curves), a hammer or mallet, a spirit level, and knee pads. Buy the spacers; folded cardboard is not a substitute, because it compresses and the gap closes up.
Acclimatise the Boards
Laminate is made from a fibreboard core, and fibreboard moves with temperature and humidity. Boards that come straight from a cold van or a cold garage into a warm room will expand after they are laid, and a floor laid tight will buckle. Acclimatising means letting the boards settle to the room’s conditions before you fit them.
The three guides that cover this all agree on 48 hours: Wickes, Howarth Timber and Mr Sander each say to leave the unopened packs flat in the room for at least 48 hours. UK Flooring Direct is the outlier at 24 hours. Follow the 48-hour rule. It costs you two days of waiting and saves you a floor that lifts in its first winter.
How the packs are stored matters as much as how long. Lay the packs flat on the floor, unopened, in the room where they will be fitted. Do not stack packs more than three high, and never store packs leaning against a wall, because boards stored on edge can bow. Keep the room at its normal living temperature while the boards acclimatise, and do not start laying on the day the heating first comes on after a cold snap.
If the boards have been stored in a cold garage or an unheated outbuilding, give them the full 48 hours in the room, not a shortcut. The same applies in reverse in summer: boards delivered on a hot day and laid immediately in a cool room will shrink and open up gaps at the joints.
Prepare the Subfloor
Laminate is a floating floor, which means it sits on top of the subfloor rather than being fixed to it, and it follows every bump underneath. A subfloor that is not flat will show up as boards that rock, joints that open, and a hollow sound underfoot. The preparation is unglamorous and it is the step most often skipped.
Start by clearing the room completely and removing the old flooring, the old underlay and any gripper rods or staples. Vacuum thoroughly, because grit trapped under the underlay will crunch underfoot forever. Then check the subfloor with a long spirit level or a straight edge, looking for dips and high spots. A dip deeper than about 3mm over a metre needs attention.
On a concrete subfloor, fill dips with a self-levelling compound and grind down high spots. Let the compound cure fully before you lay anything on it. Concrete must also be dry. If the concrete is new, it needs weeks to dry out, not days, and a damp concrete slab will damage laminate from below. If you are unsure, a simple moisture test is to tape a square of clear plastic to the slab for 24 hours and check for condensation underneath.
On a timber subfloor, screw down any loose boards so they stop creaking, and replace boards that are rotten or split. Check the joists are sound where you can see them. Small dips in a timber floor can be packed with hardboard or thin plywood, but a floor with a serious slope needs a professional to look at it before you cover it up.
Remove the skirting boards if you can. Laminate needs an expansion gap around every edge, and the gap is hidden by the skirting afterwards, which gives a far cleaner finish than beading stuck on top of the skirting. If the skirting is old and will not come off cleanly, leave it in place and plan to cover the gap with quadrant beading instead. If you have just replastered the room as part of the renovation, our guide to how to plaster a wall for beginners covers the patch-first method, and the plaster must be fully dry before the floor goes down.
Check the doors before you lay anything. Laminate plus underlay raises the floor level by roughly 10 to 15mm, and doors that used to swing freely will scrape. Take the doors off their hinges before you start, and trim the bottoms after the floor is laid if they catch.
Choose the Right Underlay
Underlay is not optional, and it is not one product. It does three jobs: it smooths out tiny imperfections in the subfloor, it softens the hollow clicking sound laminate makes underfoot, and on concrete it stops damp rising into the fibreboard core. Which underlay you need depends on the subfloor underneath.
For a timber subfloor, fibreboard underlay is the usual choice. It insulates, it hides small uneven spots, and it gives a solid feel underfoot. Lay fibreboard at 90 degrees to the direction the laminate boards will run, so the joints in the underlay do not line up with the joints in the floor. Butt the sheets tightly together and tape the joins.
For a concrete subfloor, use a foam underlay with an integrated damp-proof membrane, often called a DPM. The membrane faces down against the concrete. If your underlay has no membrane, lay a separate polythene DPM sheet first, overlapping the joins by at least 200mm and running it up the walls slightly, trimming it off after the skirting goes back on.
Whatever type you use, the same two rules apply. Tape the underlay joins, and never overlap the underlay. Overlapping creates a ridge that shows through the laminate and rocks the boards above it. Lay the underlay one row at a time as you go, rather than covering the whole room at once, so you are not walking on it and creasing it before the boards go down.
Do not use carpet underlay under laminate, and do not double up underlay to make the floor feel softer. Laminate manufacturers set a maximum underlay thickness, usually around 3mm for foam, because too much softness lets the click joints flex and break. If the floor feels bouncy after laying, the underlay is usually the cause.
Lay the Boards: Pattern and Expansion Gaps
With the layout planned, the boards acclimatised, the subfloor flat and the underlay down, the laying itself is the straightforward part. Work from the corner of the longest wall, with the tongue edge of the first board facing the wall, and the groove facing into the room.
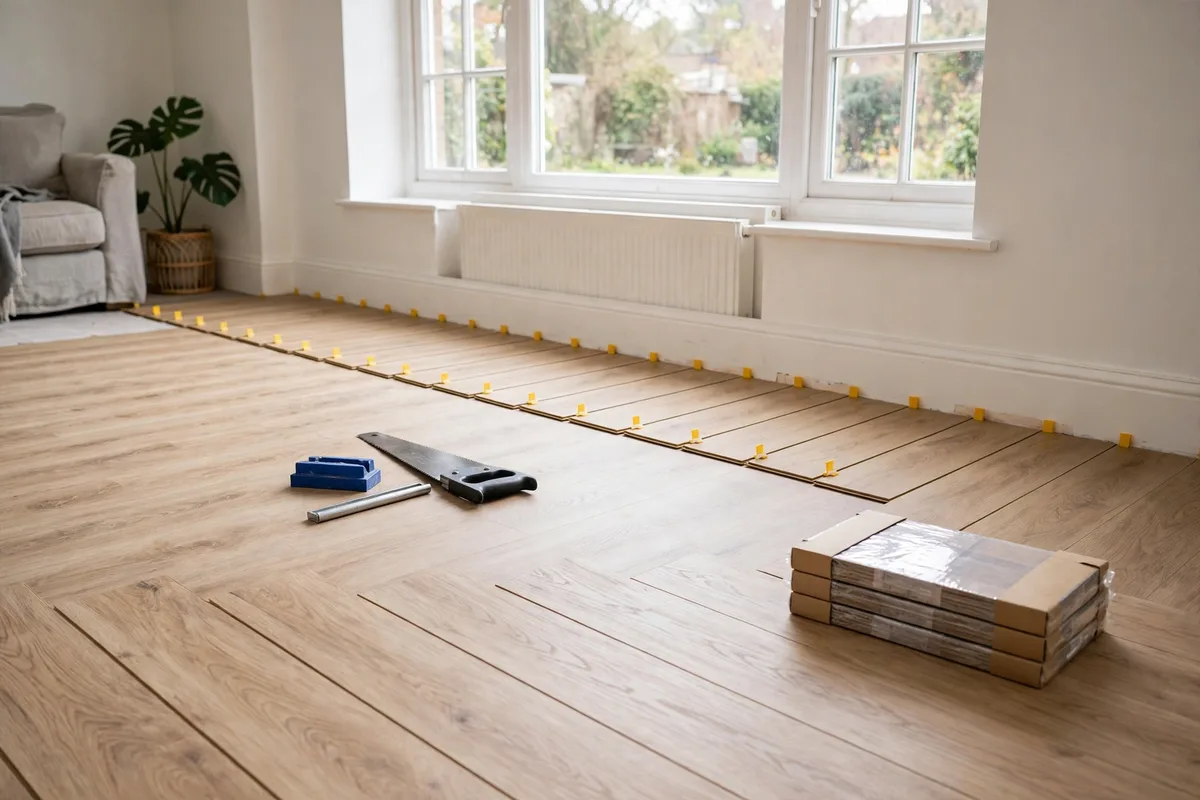
Place spacers between the first row and the wall, and between the end of the first board and the side wall. The expansion gap is the most important measurement in the whole job. Wickes, Howarth Timber and MyJobQuote all agree on 10 to 12mm around every edge, including at doorways and around pipes. Mr Sander gives 8 to 10mm. Use 10 to 12mm spacers and you are inside every guide’s range. The gap lets the floor expand in summer humidity without buckling, and it is hidden afterwards by skirting or beading, so a generous gap costs you nothing visually.
Click the boards together at an angle, lowering each board down until the joint locks. Use the tapping block and mallet to close the joints, tapping the block, never the board edge directly, because a hammer on a laminate edge will crush it. Work row by row across the room. When you reach the end of a row, measure the remaining space, mark the board, cut it, and keep the offcut to start the next row, provided it is at least 300mm long. If the offcut is shorter than that, start the next row with a fresh board cut to a different length, so the end joints stay staggered.
Keep the spacers in place along both side walls as you go, and check every few rows that the floor is still square to the wall. A row that drifts even a few millimetres will show up as a wedge-shaped gap at the far wall. If the first row was laid straight and the boards are clicking in properly, the rows stay true. If joints are not closing, stop and find out why, because forcing boards together damages the click profile and the joint will never sit flat.
For the last row, measure the gap between the last full row and the wall, subtract the expansion gap, and rip the boards to width along their length. Use the pull bar to draw the last row tight against the row before it, because there is no room to swing a tapping block. This is the row your planning was for: if it ends up at least 60mm wide, it clicks in cleanly and looks like part of the floor.
Expect the job to take time. MyJobQuote puts a single average room at one to two days for a first-timer, and a large space or several rooms at two to five days. That is realistic once measuring, cutting and trimming are included. Rushing the last row is how floors end up with a sliver that lifts within months.
Cut Around Doors and Pipes
Doors and pipes are where a neat floor becomes a scruffy one, and both have a standard method.
For door frames and architraves, do not try to cut the laminate to fit around the shape of the frame. Take the door off its hinges first, then lay a spare board flat on the underlay next to the architrave and use it as a height guide. Cut the bottom of the architrave with a panel saw or a jamb saw so the laminate slides underneath it, leaving the expansion gap hidden inside the cut. The board should slide under the architrave with a small gap around it, not jammed tight. Do the same at any built-in cupboard or fitted furniture that reaches the floor.
For radiator pipes, mark the pipe position on the board, drill a hole slightly larger than the pipe, usually about 15mm wider in diameter, then cut a wedge from the hole to the nearest board edge so the board can be fitted around the pipe. Glue the small wedge piece back in behind the pipe once the board is down. Finish with a pipe rose or collar, which covers the gap and looks deliberate. The extra width in the hole is part of the expansion gap, and it matters, because a board jammed against a hot pipe will buckle when the heating comes on.
For larger obstacles such as a fireplace hearth or a curved bay window, make a cardboard template first and transfer it to the board. Cut with a jigsaw for curves and a handsaw for straight cuts, and always cut with the decorative face up when using a handsaw, or face down with a jigsaw, so the blade does not chip the visible surface.
Finish with Trims and Thresholds
The floor is laid, but it is not finished until the edges are covered and the room can be used. Remove the spacers last, not before, so the floor settles into its final position with the gaps intact.
Refit the skirting boards over the expansion gap if you removed them. The gap is hidden behind the skirting and the floor can still move underneath it. If you left the skirting in place, fit quadrant beading, also called scotia, along the bottom edge of the skirting to cover the gap. Pin the beading to the skirting, never to the floor, because the floor needs to move and a pin through the laminate fixes it in place.
Fit threshold strips at every doorway where the laminate meets another floor. A threshold covers the expansion gap at the door and stops the edge of the last board from chipping. Use a ramp profile where laminate meets a lower floor, and a flat T-bar where two floors are at the same height. Leave the same 10 to 12mm gap under the threshold strip.
Refit the doors once the floor is finished, and trim the bottoms if they scrape. Check the trim by opening and closing each door fully; a door that catches on the first hot day is a door that was trimmed to a floor that had not finished expanding. Vacuum the floor, wipe it with a barely damp mop, and keep heavy furniture off it for 24 hours so the joints settle. Put felt pads under furniture feet before anything heavy goes back, because dragging furniture across a new laminate floor is the fastest way to scratch it.
Beginner Mistakes That Ruin a Laminate Floor
Most laminate failures are not bad luck. They are the same handful of mistakes, and every one of them is avoidable.
No expansion gap, or a gap that closes up. Boards laid tight to the wall have nowhere to go when they expand, so the floor buckles in the middle. Spacers left in place, beading pinned through the floor, or heavy furniture trapping the edges all cause the same problem. Check the gap is clear before the skirting goes back on.
Skipping the acclimatisation. Boards laid straight from a cold van or garage expand after fitting, and the floor lifts at the joints. Forty-eight hours flat in the room is the rule from three of the five guides checked, and it is the cheapest insurance in the whole job.
Rows not staggered. End joints lined up in a straight line look wrong and make weak lines across the floor. Keep every offcut that is at least 300mm long and use it to start the next row.
Underlay overlapped or doubled up. An overlap makes a ridge that shows through and rocks the boards. Two layers of underlay make the floor bouncy and break the click joints. One layer, joins taped, no overlaps.
Boards stored upright or stacked too high. Packs leaning against a wall bow, and a bowed board will not click flat. Flat on the floor, no more than three packs high, unopened, for the full 48 hours.
Laminate in the wrong room. Laminate and standing water do not mix. Bathrooms, wet rooms and utility rooms with frequent spills need a water-resistant floor instead, and our guide to how to tile a bathroom wall covers the wet-room side of a bathroom renovation. Laminate in a bathroom will swell at the edges, and no amount of sealant fixes it.
Cutting without measuring the last row. A final row narrower than 60mm is hard to fit, looks wrong and lifts early. Measure the room before the first board goes down and split the shortfall between the first and last rows.
Frequently Asked Questions
How long does it take to lay laminate flooring in one room?
A single average room usually takes one to two days for a first-timer, according to MyJobQuote, including measuring, cutting and trimming. A large space or several rooms take two to five days. The laying itself is quick; the cutting around doors, pipes and awkward shapes is what takes the time.
Do I need underlay under laminate flooring?
Yes, always. Underlay smooths tiny imperfections in the subfloor, softens the hollow sound underfoot, and on concrete stops damp rising into the fibreboard core. Use fibreboard underlay on timber subfloors and foam underlay with an integrated damp-proof membrane on concrete.
How long should laminate flooring acclimatise before fitting?
At least 48 hours, with the unopened packs lying flat in the room where they will be fitted. Wickes, Howarth Timber and Mr Sander all give 48 hours. UK Flooring Direct says 24 hours, but 48 hours is the safer rule and costs nothing but patience.
What size expansion gap does laminate flooring need?
Leave 10 to 12mm around every edge, including at doorways and around pipes. Wickes, Howarth Timber and MyJobQuote agree on 10 to 12mm; Mr Sander gives 8 to 10mm. Use spacers while laying, and cover the gap with skirting or beading afterwards.
Can I lay laminate flooring over my existing floor?
It depends on the existing floor. Laminate can go over a flat, sound floor such as vinyl or tiles, with the right underlay, but it cannot go over carpet, and the old floor must be level and firmly fixed. A floor that bounces or moves will break the click joints. When in doubt, lift the old floor and start from the subfloor.
Do I need to remove the skirting boards?
It gives a cleaner finish, because the expansion gap hides behind the refitted skirting. If the skirting will not come off cleanly, leave it in place and cover the gap with quadrant beading pinned to the skirting, never to the floor.
Why is my laminate floor buckling?
The usual cause is no expansion gap, or a gap that has been blocked by skirting, beading pinned through the floor, or heavy fitted furniture. The floor expands with humidity and has nowhere to go, so it lifts in the middle. The fix is to free the edges, which may mean lifting the last row and re-cutting it with the correct gap. Fitting boards that had not acclimatised is the other common cause.