
How to Hang a Door: A UK Step-by-Step Guide
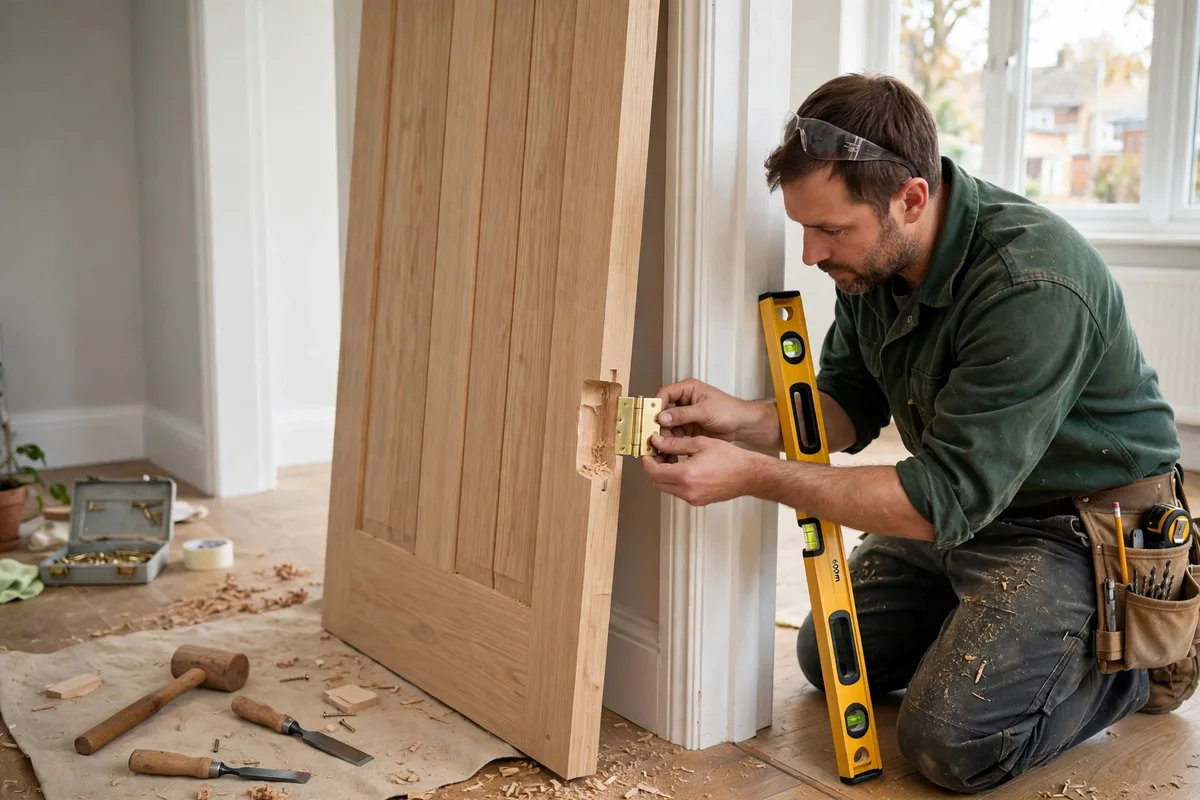
A first-timer should allow about 2 to 2.5 hours for one door, according to Door Deals, and most of that time goes on measuring and fitting the hinges, not on the hanging itself.
The order matters more than the speed. Measure the frame first, trim the door to fit the frame, mark and cut the hinge recesses, hang the door, check the swing, and only then fit the latch and handles. Every guide checked for this article agrees on that sequence, and on one rule above all: trim the door to fit the frame, never alter the frame to fit the door.
What you will need: a tape measure, a pencil, a spirit level, a sharp chisel (25mm is ideal), a mallet, a Stanley knife, a plane (a block plane or an electric planer for larger cuts), a drill and bits, a screwdriver, screws to suit the hinges (usually supplied with them), a try square, and a wedge or a door support to hold the door upright while you work. A second pair of hands is not a tool, but it is close to essential when you lift the door onto its hinges.
This guide covers a standard internal timber door. If your door is uPVC, stop here: uPVC doors are adjusted, not hung like timber, because the mechanism is different. Our guide to how to fix a sticking uPVC door covers the hinge and alignment fixes for those. Fire doors are also different, and they are covered in their own section below, because they are not a DIY job.
Measure the Frame and Work Out the Trim Allowances
Start with the frame, not the door. Check the frame with a spirit level on both sides and across the head. A frame that is out of square will make even a perfectly trimmed door stick, and it is better to find that out now than after you have cut the hinges in. If the frame is badly twisted or out of plumb, that is a carpenter’s job, not a first DIY door.
Measure the opening in three places: across the top, across the middle and across the bottom, and the height on both sides. Frames are rarely perfectly square, especially in older houses, so work from the smallest width and the shortest height. That is the opening your door has to fit.
Now work out the clearances. UK guides agree on the gaps: 3 to 4mm at the sides and at the top, and 6mm at the bottom, according to Door Deals. The gap at the bottom is bigger because it has to clear the floor covering, and if you are laying new flooring, allow for that too. Our guide to laying laminate flooring explains the expansion gap the floor itself needs, and the door clearance has to sit above it, not fight it. The old carpenter’s test is a 2p coin: the gap at the sides and top should be about the thickness of a 2p coin, and the guides repeat that test because it works.
Measure the door against the frame and mark how much needs to come off each edge. Most new doors need a little trimming, and a door that is exactly the size of the opening is a door that will stick. Mark the trim lines with a pencil and a straight edge, and check the door’s orientation before you cut anything. Work out which way it opens, which side the hinges go on, and which face is the front. Some doors have a top and a bottom, and a door hung upside down is a door that has to come off again.
Trim the edges with a plane, working from the corners towards the middle so you do not split the edge, or with a fine-toothed saw for a larger cut, followed by a plane to finish. Take a little at a time and keep offering the door up to the frame to check the fit. It is easy to take more off; it is impossible to put it back.
One warning before you trim: engineered and hollow-core doors have limits. The solid lipping around the edge of an engineered door can only be trimmed so far before you reach the hollow core, according to Trade2Base, so check the manufacturer’s guidance for your door rather than assuming one trim figure fits all doors. Hollow-core doors also have a solid lock block inside them, and you need to know where it is before you fit the latch. Look for a printed “lock” mark or a key symbol on the door edge or face, which shows where the solid block sits (DIY Doctor; Homebuilding). If there is no mark, check the paperwork that came with the door. Cutting a latch mortice into a hollow section is a mistake that ruins the door.
Mark the Hinge Positions
Most internal doors take two hinges, and heavier solid doors and fire doors need three, according to Trade2Base. If your door is solid, heavy, or taller than standard, fit three. The third hinge goes in the middle, between the other two, and it stops the door dropping over time.
The positions the guides agree on are a band, not a single exact figure. DIY Doctor puts the top hinge 125 to 150mm down from the top of the door, and the bottom hinge 200 to 230mm up from the bottom. Homebuilding gives 150mm down and 225mm up, which sits inside the same band. Use those figures: top hinge around 150mm down from the top, bottom hinge around 225mm up from the bottom, and the middle hinge, if you are fitting one, centred between them.
Mark the hinge positions on the door edge first, then transfer them to the frame. Stand the door in the opening, wedged upright with its clearances right, and mark the hinge positions on the frame from the door, rather than measuring the frame separately. That way the hinges line up even if your measurements are a millimetre out. Mark around each hinge leaf with a sharp pencil, and mark which hinge is top and which is bottom, because they are not interchangeable once you have cut the recesses.
Chop in the Hinges
Chopping in a hinge means cutting a shallow recess in the door edge and in the frame so the hinge leaf sits flush with the surface. A hinge that sits proud will push the door out of line, and a recess cut too deep will let the door drop.
Score around the hinge outline with a Stanley knife first, cutting through the surface so the chisel has a clean line to work to. Then, with the chisel bevel down, make a series of shallow cuts across the recess, about 3mm deep, and pare the waste out towards the scored line. Work slowly and test the hinge leaf in the recess often. The leaf should sit flush with the door edge, with no rocking and no gap underneath it.
Do the door edge first, then the frame, using the same method. When you cut the frame recesses, the door should be out of the opening, and the frame marks you transferred earlier are your guide. Keep the chisel sharp. A blunt chisel tears the timber and slips, and most chisel injuries happen with a blunt edge, not a sharp one.
Screw the hinges to the door first, using the screws supplied with them, and drill pilot holes so the screws do not split the edge. Do not fully tighten the last screw on each hinge until the door is hung and checked, because you may need a small adjustment.
Hang the Door and Check the Swing
This is the two-person step. Lift the door into the opening, rest it on a wedge so the bottom clearance is right, and line the hinge leaves up with the recesses in the frame. Put one screw in the top hinge first, then one in the bottom hinge, and let the door take its own weight before you put the rest in.
Now check the swing. Open and close the door slowly and watch the gaps. The door should close without catching, the gaps should be even all round, and the door should stay where you leave it when it is half open. If it swings shut on its own, the frame is out of plumb on the hinge side. If it swings open, the frame is out of plumb the other way. A small amount of that is normal in an old house, and a door that stays put is a sign the frame is true.
If the door catches, find where it catches before you reach for the plane. Rub a pencil along the edge that sticks, close the door, and the pencil mark will transfer to the frame or show where the door is tight. Plane a little off the marked spot, a thin shaving at a time, and test again. Take the door off its hinges to plane it properly rather than planing it in place, and always plane from the corners towards the middle to avoid splitting the edge.
Check the gaps with the 2p-coin test once more when the door swings freely: about a coin’s thickness at the sides and top, and 6mm at the bottom. If the bottom gap is too small and the door drags on the carpet or the floor, take the door off and trim the bottom edge, remembering the lipping limits on an engineered door.
Fit the Latch and Handles
Fit the latch only once the door hangs and swings correctly. If you fit the latch first and then have to plane the door, the latch will be in the wrong place.
Mark the latch height on the door edge. The usual height is around 900mm to 1000mm from the floor, which is the height most people find natural for a handle, and it should match the other doors in the house so the handles line up. Mark the centre of the latch on the door edge, and check that it lines up with the solid lock block on a hollow-core door. That is what the printed “lock” mark is for, and it is the step people skip and regret.
Drill the hole for the latch body from the door edge, keeping the drill square, then cut the recess for the latch faceplate with a chisel, in the same way as the hinges, so the faceplate sits flush. Fit the latch, then drill through the door face for the handle spindle, following the template that came with the handles. Fit the handles on both sides, tighten the screws evenly, and test the latch by closing the door gently. The latch bolt should meet the strike plate on the frame without forcing, and the door should stay shut without being pushed.
Mark the strike plate position on the frame from the latch bolt, cut its recess, and screw it in. Close the door and test the handle several times. If the latch does not catch, the strike plate is a millimetre out, and moving it by that much is a five-minute job with a chisel. If the handle is stiff, check that the spindle is not too long and that the handles are not over-tightened against the door face.
Final Adjustments
A door that is hung is not necessarily a door that is finished. Run through these checks before you call the job done.
First, check every gap again with the door closed, and check that the door does not rub anywhere through its full swing. Second, check the hinges: tighten every screw, and if a screw will not bite because the hole is worn, replace it with a longer screw that reaches into the frame timber behind. Third, check the latch and the handles work smoothly from both sides, and that the door stays shut without a push. Fourth, look at the door from the side when it is closed: it should sit flat in the frame, with no twist and no bow.
If the door sticks in one spot after a few days, it is usually the timber settling or the humidity changing, and a light pass with a plane on the marked spot will fix it. If the door drops over months, the top hinge screws are the first thing to check, and longer screws into the frame will usually lift it back. If you have painted the door, remember that paint adds thickness: a door that fitted perfectly before painting can stick afterwards, so check the gaps after the final coat. Our guide to painting a front door covers the prep and paint system for exterior doors, and the same thin-coat rule applies to an internal door: two thin coats, never one thick one, or the paint will bridge the gap and stick the door to the frame.
When the door is finished and the paint is cured, the job is done. A door that closes with a click, stays where it is left, and has even gaps all round is a door that was hung in the right order.
How Much Does It Cost to Have a Door Hung?
If you would rather pay a carpenter, the guides give bands rather than a single price, and the bands differ by source, so treat them as a range. Door Deals puts a carpenter at £70 to £100 to install a door. Trade2Base gives £40 to £90 for labour to hang a door into an existing frame, with a carpenter day rate of £200 to £320 in 2026. HomeHow says fitting can cost as little as £40, and flush or panel doors cost £70 to £150 to supply and hang. The price goes up if the frame needs work, if the door needs a lot of trimming, or if you are in London. A written quote that says whether the door itself is included is worth getting before the work starts, because “supply and hang” and “hang only” are very different prices.
Doing it yourself costs the price of the door, the hinges and the latch, plus any tools you do not already own. A basic chisel set, a plane and a drill are the only specialist items, and they are tools you will use again. For most people the choice is between about 2 to 2.5 hours of their own time and a carpenter’s half-day call-out, and either is reasonable.
Fire Doors: Leave It to a Professional
A fire door is not an ordinary internal door, and hanging one is not a DIY job. Fire doors are tested as a complete set with their frame, hinges, seals and closer, and the gaps around them are part of the fire rating, typically 3 to 4mm, with intumescent seals that expand in heat. Fitting one wrong can leave a door that looks right and fails in a fire. If your door is a fire door, or if building regulations require one, for example between a house and an integral garage, have it fitted by a competent person who can certify the installation. This article does not cover fire-door fitting beyond that warning.
Frequently Asked Questions
How long does it take to hang a door?
A first-timer should allow about 2 to 2.5 hours for one internal door, according to Door Deals. Most of that time goes on measuring, trimming and cutting the hinge recesses. A carpenter will usually do the same job in under an hour, because the measuring and hinge work is routine for them.
What gap should I leave around a door?
Leave 3 to 4mm at the sides and at the top, and 6mm at the bottom, according to Door Deals. The bottom gap is bigger so the door clears the floor covering. The 2p-coin test is the quick check: the gap at the sides and top should be about the thickness of a 2p coin.
Can I hang a door on my own?
You can do most of the job on your own, but lifting the door onto its hinges is much easier and safer with a second person. A solid door is heavy and awkward, and trying to hold it, line up the hinges and drive a screw at the same time is how doors get dropped and fingers get trapped.
How many hinges does an internal door need?
Two hinges are standard for a light internal door. Heavier solid doors and fire doors need three, according to Trade2Base, with the third hinge in the middle. If your door is solid, heavy or taller than standard, fit three from the start rather than adding one later.
Can I trim a hollow-core door?
Only within limits. Hollow-core and engineered doors have a solid lipping around the edge, and you can only trim as far as that lipping allows before you reach the hollow core, according to Trade2Base. Check the manufacturer’s guidance for your door, and find the solid lock block, marked with a printed “lock” or a key symbol, before you cut the latch mortice.
Do I need to remove the frame to hang a new door?
No. Trim the door to fit the frame, never alter the frame to fit the door. That rule is repeated in every guide checked for this article, because a frame that has been cut to fit one door will not fit the next one.
What if the door sticks after I have hung it?
Find where it catches first, mark the spot with a pencil, take the door off and plane a thin shaving off the marked area, then test again. If the sticking is on a uPVC door rather than a timber one, the cause is different: uPVC doors are adjusted with their hinges, not planed, and our guide to fixing a sticking uPVC door covers that.