
How to Fix a Squeaky Floorboard
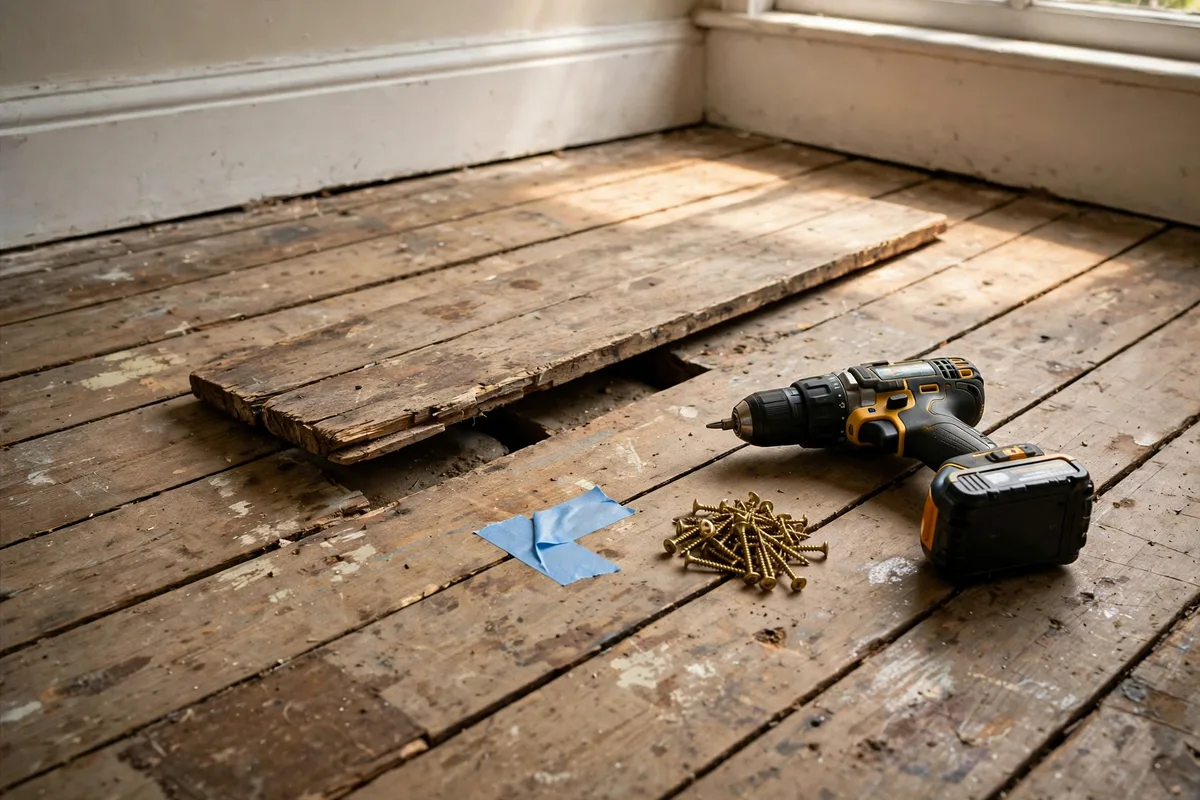
A squeaky floorboard is a small problem with an outsized effect. It wakes a sleeping baby, announces every trip to the bathroom at night, and gets worse in winter when central heating dries the timber out. The good news is that most squeaks have a simple cause and a simple fix, and you can usually sort one in under an hour with a drill and a handful of screws.
The bad news is that the wrong fix makes things worse. Screwing down a floating floor can buckle it. Drilling blind into a floor can hit a pipe or a cable. And spraying lubricant on a board that has actually come loose from its joist only buys you a few quiet weeks. So this guide starts with the decision that matters most: what kind of floor do you have, and where exactly is the squeak coming from. Get those two answers right and the fix almost chooses itself.
First, Work Out What Floor You Have
Not every wooden floor is built the same way, and the fix depends entirely on the construction. Before you touch a tool, work out which of these four you are standing on.
Suspended timber boards. This is the classic UK floor: individual pine or hardwood boards, usually 18 to 22mm thick, nailed to joists underneath, with a void below. Most Victorian, Edwardian and interwar houses have them, and they are the floors this guide is mainly about. You can often see the boards from below in a cellar, or lift a corner of carpet and see them directly. Joists in UK homes are usually about 400mm apart, which matters when you come to screw a board down.
Chipboard on joists. Modern houses, roughly from the 1970s onwards, often use large sheets of chipboard screwed or nailed to the joists instead of individual boards. Squeaks here usually come from a sheet that has lifted slightly, a fixing that has worked loose, or a sheet edge rubbing against the next sheet. The screw-down fix still applies, but you are fixing a sheet, not a board, and the screws go into the joist through the sheet.
Floating laminate, LVT or engineered wood. These floors are not fixed to the subfloor at all. The boards click together and float on an underlay, held in place by skirting boards and their own weight. They need to move slightly with the seasons. This changes everything about the fix, and the most important rule in this guide applies here: never screw a floating floor down. Screwing it to the subfloor stops it moving, and it will buckle. If you are not sure whether your floor floats, lift a threshold strip or look at the edge under a radiator pipe cover. If the boards end in a gap against the wall with no nails or screws visible, it is almost certainly floating. Our guide to how to lay laminate flooring explains the floating construction in detail.
Stairs. A squeaky stair tread is the same problem in a different place: a tread rubbing against a riser or a stringer. The fixes in this guide work on stairs too, with a few differences covered in the stairs section below.
If you still cannot tell what you have, lift the edge of the carpet in a corner, or look at the floor from below if you have access. A minute spent identifying the floor saves an hour spent on the wrong fix.
Find the Exact Squeak Before You Fix Anything
A squeak sounds as if it comes from everywhere until you pin it down, so do this properly before you reach for any tools. Walk slowly across the room heel to toe, shifting your weight from one foot to the other, and listen. When you find a squeak, mark the spot with a strip of low-tack masking tape or a small piece of chalk. Then walk the same spot again from different directions. Squeaks often come from a board next to the one you are standing on, because the movement travels along the board to the loose fixing.
If you can get underneath the floor, from a cellar or a crawl space, this step becomes much easier. Have someone walk on the floor above while you watch from below. You will see the gap between the board and the joist open and close as they step on it, and that gap is your squeak. Mark it from below as well, and note which joist it sits on.
Mark every squeak in the room, not just the loudest one. Once you fix the worst board, the next loudest will take its place, and it is far better to fix them all in one session. Count them, and note whether each one is at a joist, between joists, or at a board joint. That tells you which fix each one needs.
The Safety Warning: Check for Pipes and Cables Before You Drill
This is the step none of the usual guides put first, and it is the one that matters most. Before you drill or screw into any floor, you need to know what is underneath it. Central heating pipes, hot and cold water pipes, and electrical cables all run under floors, and they usually run in the same direction as the joists, often notched into the top of them. A screw driven blind into a floor can puncture a pipe or nick a cable, and you will not know until the ceiling below starts dripping or a circuit trips.
Use a pipe and cable detector, the handheld kind sold at any builders’ merchant, and sweep the area around each squeak before you drill. Pay particular attention near radiators, bathrooms and kitchens, where pipes are most likely to run. If the detector signals anything, move your fixing point or use a different method, such as the talc or shim fixes below.
Never screw blind into a floor near a radiator, a bathroom or a kitchen without checking first. If you cannot get a detector, or the detector gives an unclear reading, do not drill. Use the no-tool fixes, or call a professional who can lift the board and look. And before any work near pipes, make sure you know where your stopcock is, so you can shut the water off quickly if anything goes wrong. Our guide to where your stopcock is shows you where to look by house type.
If you are working in a room above a ceiling with downlights, remember that cables often run across the joists to reach them. The same warning applies: detect first, drill second.
Quick Fixes That Need No Tools
If the squeak is mild, or you need quiet tonight and a proper fix at the weekend, try these first. They cost almost nothing and they tell you something useful: if a quick fix silences the squeak, the cause is surface friction between two boards. If it does nothing, the board has lifted from its joist and needs a screw.
Talcum powder or powdered graphite. Sprinkle it generously along the joint between the squeaking board and its neighbour, then walk over the spot to work it down into the gap. Both act as a dry lubricant, letting the boards slide past each other silently instead of rubbing. Use a soft brush or a piece of card to push the powder into the joint, and wipe up the excess. This is a temporary fix, not a permanent one. Expect a few months of quiet, not years, and expect to repeat it. It is best for boards that rub at the tongue and groove joint, and it does nothing for a board that has lifted off its joist.
Wood glue in a hairline gap. For a narrow gap between two boards that rub, a thin line of wood glue worked into the joint with a flexible filling knife can bond the boards together and stop the movement. Wipe off the excess before it sets, and do not walk on it for a few hours. This only works for small gaps. Do not use glue to fill a wide gap, and do not glue a board to its joist from above, because you cannot get the glue where it needs to go and you will make the eventual proper fix harder.
Tighten a loose floorboard nail. Sometimes the squeak is a single nail that has worked loose and now moves up and down in its hole. If you can see the nail head, tap it back down with a hammer and a nail punch, then drive a screw next to it to hold the board properly. Do not just hammer the nail and leave it, because it will work loose again. A screw next to it is what keeps the board still.
These fixes are worth trying because they are fast and they diagnose the problem. If none of them helps, the board has come away from the joist, and the next section is the fix you need.
The Permanent Fix: Screw the Board Down to the Joist
For a nailed timber board or a chipboard sheet that has lifted from its joist, the permanent fix is to screw it back down. This is the fix the flooring guides agree on, and it is the one that lasts.
What you need: a drill, a pipe and cable detector, a pencil, masking tape, floorboard screws, a countersink bit or a drill bit slightly wider than the screw head, and wood filler to match the floor.
Screw length. This is a band, not a single figure, and it depends on your board thickness. For standard 18 to 22mm boards, use a floorboard screw of 40 to 50mm, long enough to bite firmly into the joist below. Some guides give 50 to 65mm for the same job, which is fine for thicker boards, but a screw that is too long risks passing through the joist and hitting a pipe or cable notched into it. Check your board thickness first, by measuring at a lifted board, a vent, or an edge, and choose the shortest screw that will still grip the joist by at least 20mm.
How to do it:
- Mark the joist positions. Joists are usually about 400mm apart. Find them by following the line of existing nails across the boards, or by measuring from a known joist, or by checking from below. Mark each joist line on the board with pencil and masking tape.
- Detect for pipes and cables along the joist line, and mark any hits. Move your screw position if needed.
- Drill a pilot hole through the board and just into the joist, using a bit slightly narrower than the screw. A pilot hole stops the board splitting and makes the screw pull the board down instead of pushing it up.
- Countersink the hole so the screw head sits just below the surface of the board. This matters if the floor will be sanded or if you want the fix to be invisible under carpet.
- Drive the screw in slowly until the board pulls tight against the joist. Stop as soon as it is firm. Overtightening can strip the hole in the joist or crack the board.
- Use two screws per board per joist, one near each edge of the board, for a board that is wide. For a narrow board, one screw per joist is usually enough.
- Fill the screw holes with wood filler, let it dry, and sand it flush if the floor is exposed.
Walk over the spot and test it. If the squeak is gone, move to the next marked spot. If it has only moved, the board may be loose at a second joist, so repeat the fix at the next joist along.
One warning: if the board is badly cupped, split, or rotted, screwing it down will not save it. A damaged board needs replacing, and that means lifting it properly, which is a bigger job. If the damage is caused by damp, fix the damp first. Our guide to the types of damp in a house explains how to tell condensation, rising damp and penetrating damp apart, because a board that is rotting from damp will keep failing until the damp is dealt with.
Fixing a Squeak From Below
If you can get under the floor, you can often fix a squeak without touching the floor surface at all. This is the neatest option for a floor you do not want to drill into, such as a period floor with wide original boards.
Have someone walk above while you watch from below. When you see the gap between the board and the joist open and close, you have found it. Push a thin wooden shim, a wedge of softwood, into the gap with a little wood glue on it, and tap it gently until it is snug. Do not hammer it in hard. You only want to fill the gap, not lift the board. Once the glue sets, trim the shim flush with a chisel or a saw.
For a larger gap, use a small block of wood glued and screwed to the side of the joist, so its top edge supports the board from below. This is called a nogging or a cleat, and it is the proper fix for a board that has sagged between joists or where the joist itself has shrunk slightly with age.
From below, you can also see the cause directly. If a joist has a pipe notched into it and the board is bouncing on the pipe, the fix is a shim, not a screw. If a joist is cracked or a board is split from below, you will see it, and you will know the job is bigger than a screw.
Fixing a Squeak Through Carpet Without Lifting It
Lifting a fitted carpet to fix one squeak is a lot of disruption for a small job, and there is a kit made for exactly this situation. Scored snap-off screws are driven through the carpet and the board into the joist, then snapped off just below the surface of the board, leaving the carpet intact with only a tiny hole that closes up in the pile. The kits usually include a depth-control fixture that stops the screw at the right depth and a jig to find the joist.
This method works well on a carpeted timber floor where you know the joist positions. It does not work on a floating floor, and it does not work if you cannot find the joist, so the same rules apply: detect for pipes and cables first, and confirm the joist position before you drive anything. Use it for one or two squeaks, not a whole room. If the whole room squeaks, the carpet needs to come up and the floor needs a proper look.
After snapping the screws off, run your hand over the carpet to check nothing is poking through. If you can feel a sharp point, the screw did not snap cleanly, and you will need to lift the carpet at that spot and deal with it properly.
Floating Floors: What to Do, and What Never to Do
A floating floor squeaks for different reasons, and the fixes are different too. The boards click together and sit on an underlay, so a squeak usually comes from the joints, from the underlay, or from a board rubbing against a skirting board or a door frame where the expansion gap has closed up.
What to try: first check the expansion gap around the edge of the room. If a board has swollen in damp weather and is pressing hard against the skirting, it will creak every time you step on it. Trimming the board back to restore a small gap can fix it. Second, try a joint lubricant made for laminate floors, worked into the click joints along the squeaking boards. This is the floating-floor equivalent of talc, and it is temporary in the same way. Third, check whether the underlay has failed or bunched up under the squeaking boards. If it has, the boards need lifting and the underlay replacing in that area, which is a bigger job but still a DIY one for a small patch.
What never to do: never screw a floating floor down. The whole point of a floating floor is that it moves with the seasons, expanding in damp weather and contracting when the heating dries the air. Screwing it to the subfloor stops that movement, and the floor will buckle, gap, or lift at the joints. If a floating floor squeaks badly across a whole room, the problem is usually the subfloor underneath, a failed underlay, or boards that were fitted without enough expansion gap, and the fix is to lift and refit, not to pin it down.
If you are planning a new floating floor, getting the subfloor flat and the underlay right at the start is what stops squeaks later. Our guide to how to lay laminate flooring covers acclimatising the boards, subfloor preparation, underlay choice and expansion gaps, which are the steps that prevent this problem.
Squeaky Stairs: The Same Rules, a Different Spot
A squeaky stair tread is usually a tread rubbing against a riser or against the stringer at the side, and the same principles apply: find the exact spot, check what is underneath, then fix the movement.
From above, try talc or powdered graphite in the joint where the tread meets the riser, or drive a screw through the tread into the riser from above, angled slightly, and fill the hole. From below, if you can get under the stairs, glue and screw a small triangular block into the angle between the tread and the riser. These blocks, called glue blocks, are how stairs were built in the first place, and replacing a failed one is the proper fix.
Do not screw through a stair tread blind. Stairs often have pipes or cables running underneath them, and the treads are thinner than floorboards, so the pipe and cable detector matters here just as much. If the stairs are carpeted, the snap-off screw kit works on treads too, but test it on the least visible tread first.
When to Stop and Call a Professional
Most squeaks are a DIY job. These are not.
Widespread squeaks across a whole floor. If every board in a room squeaks, the cause is structural: joists that have shrunk, a subfloor that has failed, or fixings that have failed across the whole floor. Screwing down one board at a time will not fix it, and the floor needs a proper survey.
A floor that bounces or dips. If the floor moves under your weight, or a board dips noticeably when you stand on it, the joist or the board itself may be damaged. Do not screw it down and hope. Get a carpenter or a structural surveyor to look at it.
Signs of damp or rot. If boards are soft, discoloured, or smell musty, or if you can see damp on the walls at floor level, the squeak is a symptom of a damp problem. Fixing the board without fixing the damp means the next board will fail too.
Parquet or herringbone floors. Parquet blocks are glued down, not nailed, and a squeaking parquet floor usually means the adhesive has failed or the subfloor has moved. The fix is a specialist job, and drilling into parquet will damage blocks that are expensive to replace.
A squeak that appeared suddenly after a leak. If a floor that was quiet suddenly starts squeaking after a leak, a burst pipe or a flood, the timber has swollen and moved. Let it dry fully first, which can take weeks, and then assess it. Fixing it while it is still wet will not hold.
For any of these, get two or three local quotes and ask each tradesperson what they think the cause is before they quote the fix. A good carpenter will want to see the floor from below before giving a price, and that is a sign they know what they are doing. For the everyday squeak, though, the fix in this guide is the right one: identify the floor, find the exact spot, check for pipes and cables, then screw the board down. For the impact-noise side of floor sound, see also our guide to how to soundproof a room, which covers floors and ceilings level by level.
FAQ
Why do floorboards squeak more in winter?
Central heating dries the air and the timber, so boards shrink slightly and the gaps between boards and joists open up. A board that was snug in summer can rub and move in winter. This is also why squeaks often appear in the first cold snap and ease off in spring.
Can I fix a squeaky floorboard without lifting the carpet?
Yes, with a scored snap-off screw kit, which drives a screw through the carpet and the board into the joist, then snaps off below the surface. It works for one or two squeaks on a carpeted timber floor. It does not work on a floating floor, and you still need to check for pipes and cables first.
What size screw should I use for a floorboard?
For standard 18 to 22mm boards, use a floorboard screw of 40 to 50mm, long enough to grip the joist by at least 20mm. Some guides give 50 to 65mm for the same job. Check your board thickness first and choose the shortest screw that will still grip the joist, because a screw that is too long can hit a pipe or cable notched into the joist.
Will talcum powder permanently fix a squeaky floorboard?
No. Talc or powdered graphite is a dry lubricant that stops boards rubbing at the joint, but it is a temporary fix that lasts months, not years. If the board has lifted from its joist, only screwing it down will fix it permanently.
Why should I never screw down a floating floor?
A floating floor is designed to move with the seasons, expanding in damp weather and contracting when the heating dries the air. Screwing it to the subfloor stops that movement, and the floor will buckle, gap, or lift at the joints. Fix floating-floor squeaks with joint lubricant, expansion-gap checks, or by lifting and refitting.
How do I find a joist under floorboards?
Follow the line of existing nail heads across the boards, measure about 400mm from a known joist, or look from below in a cellar or crawl space. A stud finder or a pipe and cable detector can help confirm the position, and you should always use a detector before drilling.
What should I do before drilling into a floor?
Sweep the area with a pipe and cable detector, especially near radiators, bathrooms and kitchens, and know where your stopcock is in case you hit a pipe. Never drill blind into a floor. If the detector gives an unclear reading, use a no-tool fix or call a professional.
When is a squeaky floor a sign of a bigger problem?
When the whole floor squeaks, when the floor bounces or dips under your weight, when boards are soft or smell musty, or when the squeak appeared suddenly after a leak. Those point to structural movement, damp or rot, and a carpenter or surveyor should look at the floor before you try to fix it.