
How to Stop Frozen Pipes (and Thaw Them Safely): A UK Homeowner’s Guide
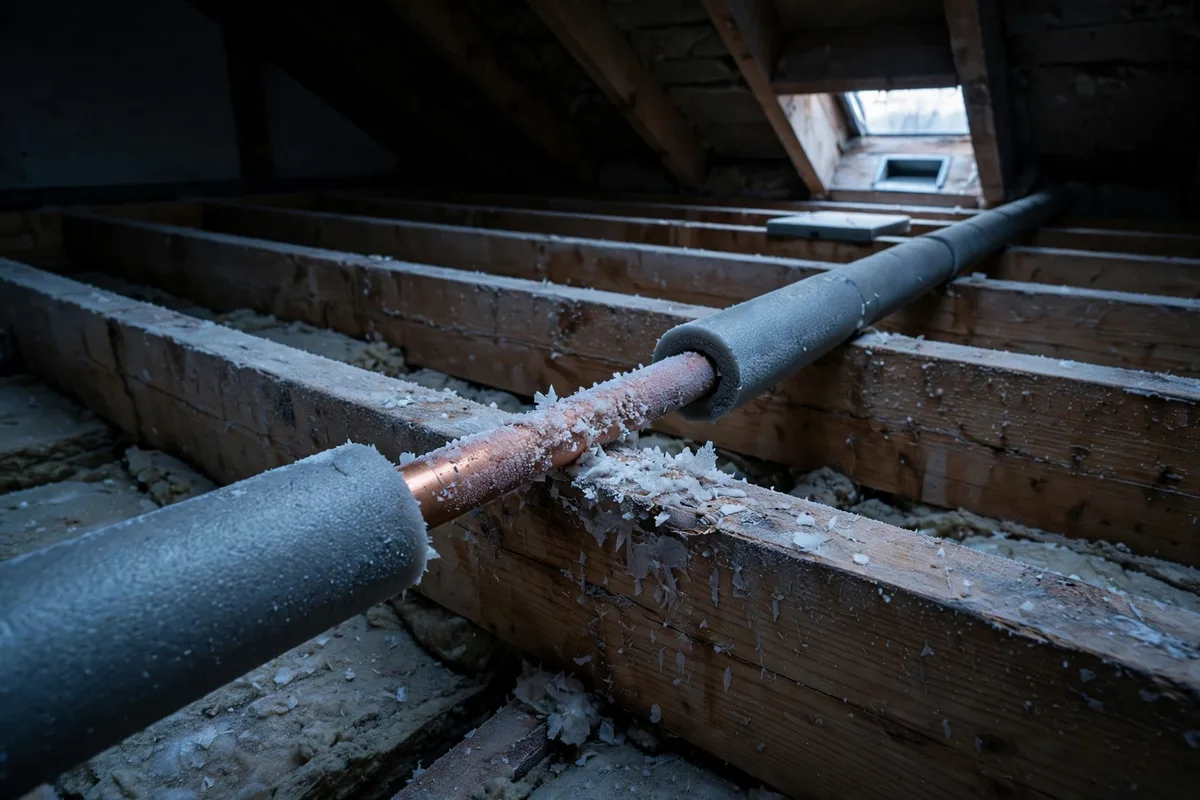
A frozen pipe is a quiet problem until it is a loud one. Water expands as it freezes, and a pipe that has frozen solid can split. The split often stays hidden while the ice plugs the pipe, and the flood starts only when the ice melts and water runs through the crack. That is why a burst pipe in winter so often floods a house at 3 a.m., or while the owners are away for Christmas.
The good news is that most frozen pipes are preventable, and the ones that do freeze can usually be thawed safely if you work in the right order. This guide covers all three stages in the order that matters: stop the pipes freezing in the first place, thaw a frozen pipe without making it worse, and what to do in the first ten minutes if a pipe has already burst.
Prevent Frozen Pipes: Lagging and the Vulnerable Spots
Prevention is a job for autumn, before the first hard frost. A pipe does not need to be outside to freeze. Any pipe that runs through an unheated space can freeze on a cold night, and the vulnerable spots are the same in almost every UK home.
Lag every exposed pipe. Pipe lagging is a sleeve of foam insulation that slips over the pipe, and it is the single most effective defence. Lag all hot and cold water pipes in the loft, in the garage, under suspended floors, in cellars and outbuildings, and any pipe that runs along an outside wall. Pay attention to the places that are easy to miss: bends, valves, stopcocks, T-junctions and the short sections where a pipe passes through a cold wall. Ice forms at the bare section. A metre of unlagged pipe between two lagged runs is the metre that freezes.
Check the loft first. The loft is the most common place for a frozen pipe in a UK home, because it is cold, draughty and easy to forget. The cold water tank feed, the overflow pipe and the pipes that run to the bathroom are all up there. If your loft has been topped up with insulation, check that the pipes are lagged rather than buried under the insulation, and that the insulation does not cover the cold water tank itself. The tank needs the warmth from the house below it to stay above freezing.
Lag the outside tap pipe too. The pipe that feeds an outside tap is exposed by design. Close its indoor isolating valve, usually found just inside the wall where the tap pipe enters the house, then open the outside tap so the short length of pipe drains. Leave the outside tap open until spring. A tap left connected to a hose over winter is a common cause of a burst, because the trapped water has nowhere to go when it freezes.
Seal the draughts around pipes. Cold air pouring through a gap in the wall or floor will freeze a pipe far faster than still cold air. Seal the gaps where pipes pass through outside walls and floors with a suitable filler, and fit a draught excluder or cover over a letterbox or a disused vent near pipework. This is cheap work, and it protects the pipes and cuts heat loss at the same time.
Keep some heat in on freezing nights. When a hard frost is forecast, leave the heating on low overnight, or set the thermostat to its frost setting, rather than turning the heating off completely. A house that never drops below a few degrees above freezing will not freeze its pipes. Leaving cupboard doors open under sinks on outside walls lets warm air reach the pipes behind them. This costs a little in heating, but a burst pipe costs far more. UK insurers settled about 12,000 weather-related burst pipe claims in 2023, with the average claim worth more than £17,000 (ABI, reported by Insurance Times). That figure is a reminder of what is at stake, not a reason to panic: a few hours of lagging in autumn prevents almost all of it.
Find and test the stopcock now. Before winter arrives, find your internal stopcock, usually under the kitchen sink, though in some houses it is under the stairs, in a downstairs cupboard, or near where the water main enters the house. Turn it clockwise to close it, then anticlockwise to open it again, and check that the water actually stops. If the stopcock is seized, or water keeps running with it closed, have it replaced before winter, not during a flood. Knowing where the stopcock is, and knowing it works, is the difference between a burst pipe and a flooded house.
Going Away in Winter: The Checklist
Most winter floods happen while the house is empty. A house that is unheated for a week in January is a house full of pipes waiting to freeze, and a burst that happens on day two of a holiday can run for five more days before anyone notices. If you are going away in winter, work through this checklist before you lock the door.
Leave the heating on low. Set the heating to come on for a few hours a day, or leave it on a low constant setting with the thermostat at around 12 to 15 degrees. Do not turn the heating off completely to save money while you are away. The saving is small, and the risk is a burst pipe flooding an empty house for days.
Turn off the water if the house will be empty for more than a few days. Close the internal stopcock and open the cold taps, starting with the lowest tap in the house, to drain the system. Leave the taps open while you are away, so that if any water remains and freezes, it has room to expand. If you have a hot water cylinder, follow the manufacturer’s guidance for draining it, and never drain a system you are unsure about without advice.
Insulate the outside tap and drain it. Close the indoor isolating valve, open the outside tap, and leave it open until you return in spring. Disconnect and store any garden hose.
Ask someone to check the house. Give a key to a neighbour, friend or family member and ask them to pop in every couple of days. A five-minute visit can catch a leak before it becomes a flood. Leave them your number and your plumber’s number, and show them where the stopcock is before you go.
Know your boiler’s frost protection. Many modern boilers have a frost protection mode that fires the boiler briefly when the temperature drops, to protect the boiler and its pipes. Check your boiler manual and make sure this is switched on before you leave. A boiler left with its power switched off has no frost protection at all. If you are unsure what your boiler does in frost, ask the engineer at your next service. An annual boiler service before winter is the right time to check that the frost protection works and that the condensate pipe is clear.
Make sure the radiators are working properly. A cold radiator in a room with exposed pipework means that room gets colder than the rest of the house. Before winter, check that every radiator heats evenly from top to bottom. If some are cold at the bottom or one room never warms up, the system may need balancing or bleeding before the cold weather arrives.
Thaw a Frozen Pipe Safely (Order Matters)
You will know a pipe is frozen when a tap runs dry or barely trickles while the other taps work normally, or when a section of pipe has a visible bulge or a coating of frost on the outside. The order of the steps matters more than the speed. Thawing too fast, or thawing in the wrong place, is what turns a frozen pipe into a burst pipe.
Step 1: turn off the stopcock first. Before you touch the frozen pipe, close the internal stopcock. If the pipe has already split, the flood starts the moment the ice melts, and with the stopcock closed you have time to find the split first. Then turn off the heating and hot water as well, so the system is not pushing more water into a frozen section.
Step 2: open the tap the frozen pipe feeds. Open the tap nearest the frozen section, and leave it open. This gives the melting water somewhere to go, and it relieves the pressure building up behind the ice. Do not open hot taps to drain a frozen system: if the pipes to a hot water cylinder are frozen, opening hot taps can cause the cylinder to collapse, because air cannot replace the water leaving it (Scottish Water advice).
Step 3: check for a split before you thaw. Look along the frozen section for a bulge, a crack, or water staining on the pipe, the wall or the ceiling below it. A split only leaks once the ice melts, so a pipe can look fine while it is frozen and leak badly once it thaws. If you find a split, do not thaw it: keep the stopcock closed, put a bucket under it, and call a plumber.
Step 4: thaw slowly, from the tap end, working back. Start at the tap end of the frozen section and work back towards the frozen blockage, so the melting water can escape through the open tap. Use a hot water bottle, towels soaked in hot (not boiling) water, or a hairdryer on its lowest setting, held well away from any water. Replace the towels as they cool. This is slow work, and it should be: gentle, even heat is what a frozen pipe needs.
Step 5: never use a flame. Never thaw a pipe with a blowtorch, a heat gun, a candle, or boiling water poured straight onto the pipe. Sudden intense heat can crack the pipe, loosen soldered joints, or set fire to lagging and timber. Every trade and water-company guide agrees on this, and it is the one rule with no exceptions.
Step 6: check the whole run before you turn the water back on. Once water flows freely from the tap, work along the full length of the pipe and check every joint and bend for leaks. Then turn the stopcock back on slowly, and watch the pipe for a few minutes. A small split may only drip at first. If anything leaks, close the stopcock again and call a plumber.
What not to do. Do not switch on the immersion heater or turn the boiler up to force a thaw (Scottish Water advice). Do not leave a hairdryer running unattended on a pipe, and never use any electrical appliance near standing water. If you cannot find the frozen section, or if more than one tap is affected, the freeze may be in a main supply pipe, and that is a job for a plumber or your water supplier.
If It Bursts: The First 10 Minutes
A burst pipe can release hundreds of litres of water an hour. What you do in the first ten minutes decides whether the damage is a wet patch or a ruined ceiling. Stay calm, and work through these steps in order.
Minute 1: turn off the stopcock. Close the internal stopcock, turning it clockwise, and if it is seized, use the external stopcock at the boundary of your property. This is the single most important step, and it is why finding and testing the stopcock in autumn matters. If you cannot find the stopcock, call your water supplier’s emergency line.
Minute 2: turn off the heating and hot water. Switch off the boiler and the immersion heater. This stops the system pushing more water into the burst section, and it removes an electrical risk from water spreading through the house.
Minute 3: open the cold taps to drain the system. Open all the cold taps, starting with the lowest tap in the house, so the water in the pipes drains out through the taps instead of through the burst. Do not open the hot taps, for the reason given above: a hot water cylinder with frozen pipes can collapse if hot taps are opened.
Minute 4: turn off the electricity if water is near it. If water is running near light fittings, sockets, the fuse box or any electrical appliance, switch off the electricity at the consumer unit. Do not touch switches or appliances while standing in water, and do not go into a room where water is dripping from a light fitting until the power is off.
Minutes 5 to 10: contain the water and protect what matters. Put buckets and towels under the leak, move rugs, furniture and anything valuable out of the way, and lift curtains clear of the floor. If water is coming through a ceiling, place a bucket under the bulge and, if the ceiling is bulging badly, pierce a small hole in the lowest point of the bulge with a screwdriver so the water drains in a controlled way instead of bringing the ceiling down. Then call a plumber, and take photos and video of the damage for your insurer before you start clearing up.
After the plumber has fixed the burst, the drying-out stage begins, which is covered in the next section. Do not switch the water back on until the repair is complete and the plumber has checked the rest of the system, because a freeze that burst one pipe often weakens others.
Drying Out Afterwards
A burst pipe is not finished when the water stops. Water that has soaked into floors, walls and ceilings keeps causing damage for weeks if it is left to dry on its own, and damp left in place becomes mould. Drying out properly takes time, and it is worth doing thoroughly.
Remove the water first. Mop up standing water, use towels for what a mop cannot reach, and hire or borrow a wet vacuum if there is a lot of water. Lift carpets and underlay, and take them outside or to a dry room. Water trapped under a carpet will rot the floorboards underneath it.
Dry the structure, not just the surface. Open windows on dry days to ventilate, run a dehumidifier in the affected rooms, and keep the heating on low and steady. A room can look dry on the surface while the plaster and timber behind it are still wet, so keep the dehumidifier running for days, not hours, and empty it regularly. A moisture meter, borrowed or hired, will tell you when a wall is actually dry, and it is worth checking before you redecorate.
Check for hidden damage. Water travels along joists and inside walls, so check the rooms below and beside the burst, not just the room where the water appeared. Look for staining on ceilings, soft plaster, swollen skirting boards, and doors that no longer close properly. If you are unsure whether a wall or floor is dry, ask a damp specialist or your insurer’s loss adjuster before you replaster or lay new flooring.
Watch for mould. Mould can start growing within 24 to 48 hours on a damp surface. If you see black spots on a wall or ceiling after a burst, treat them promptly and keep the area ventilated and dry. If mould covers a large area, or if anyone in the house has a respiratory condition, get professional advice rather than tackling it yourself.
Tell your insurer early. Report the burst to your home insurer as soon as the immediate emergency is dealt with, and keep receipts for the plumber, the dehumidifier hire, and any emergency work. Your insurer will usually want to send a loss adjuster, and they may arrange the drying out themselves. Do not throw away damaged items until the insurer has seen them or agreed you can dispose of them.
Prevent the next one. Once the house is dry, lag the pipe that burst and every other exposed pipe in the same area. A burst is a warning that your lagging has a gap, and the same cold snap that burst one pipe will find the next weak spot if you do not fix it. If your water pressure was already low before the freeze, get the system checked as well: low pressure can be a sign of a slow leak or a restriction, and a freeze is a bad time to discover either.
Frozen Boiler Condensate Pipe: What to Do
Most modern condensing boilers have a white plastic condensate pipe that runs from the boiler to an outside drain, and it is one of the most common pipes to freeze. The signs are a boiler that stops working in cold weather, often with a gurgling sound, and a fault code on the display, for example Vaillant F28 or F29, Baxi E133 or E28, or Worcester Bosch EA. Those codes are examples, not a diagnosis: different models show different codes, so check your boiler manual.
To thaw it, pour warm (not boiling) water over the outside section of the pipe, using a jug or a hot water bottle, and then reset the boiler following the manual. Do not climb a ladder on ice to reach a high condensate pipe, and do not use a flame. If the pipe is lagged and still freezes, or if the boiler will not restart after thawing, call a Gas Safe engineer. A boiler service before winter is the best time to have the condensate pipe checked and lagged.
Frequently Asked Questions
At what temperature do pipes freeze?
Water in a pipe can start to freeze when the air around the pipe drops to around 0 degrees Celsius, and the risk rises sharply when the temperature stays below freezing for several hours, especially overnight. Pipes in lofts, garages and outside walls are the first to freeze, because they cool faster than pipes inside a heated room.
How long does it take for a pipe to freeze?
It depends on the temperature, the wind, and how exposed the pipe is. An unlagged pipe in a draughty loft can freeze in a few hours on a night well below freezing, while a lagged pipe in a sheltered spot may take a day or more. That is why a short cold snap is often enough to freeze a pipe that has survived milder winters.
Should I leave my heating on all night in winter?
On freezing nights, yes, leave the heating on low or on its frost setting rather than turning it off completely. Keeping the house a few degrees above freezing overnight is far cheaper than repairing a burst pipe, and it also protects the boiler and its condensate pipe.
Can I use a hairdryer to thaw a frozen pipe?
Yes, on its lowest heat setting, held well away from any water, and never left running unattended. Work from the tap end of the frozen section back towards the blockage, and check for a split before you start. A hot water bottle or towels soaked in hot water are safer if you are unsure.
How do I know if a frozen pipe has burst?
Often you will not know until it thaws. A split pipe stays plugged by ice while it is frozen, and only leaks once the ice melts. That is why you should turn off the stopcock before thawing, open the tap the pipe feeds, and inspect the whole length of the pipe for bulges, cracks and staining before you turn the water back on.
Will my home insurance cover a burst pipe?
Most standard UK home insurance policies cover water damage from a burst pipe, but the details vary: some policies require you to have taken reasonable steps, such as leaving the heating on while away, and some exclude damage if the house was left unoccupied for a long time without telling the insurer. Check your policy before winter, and tell your insurer early if a burst happens.
What should I do first if I find a burst pipe?
Turn off the stopcock, turn off the heating and hot water, open the cold taps to drain the system, and switch off the electricity if water is near any fitting or appliance. Then contain the water, move valuables out of the way, call a plumber, and photograph the damage for your insurer.