
How to Balance Radiators: A UK Homeowner’s Guide
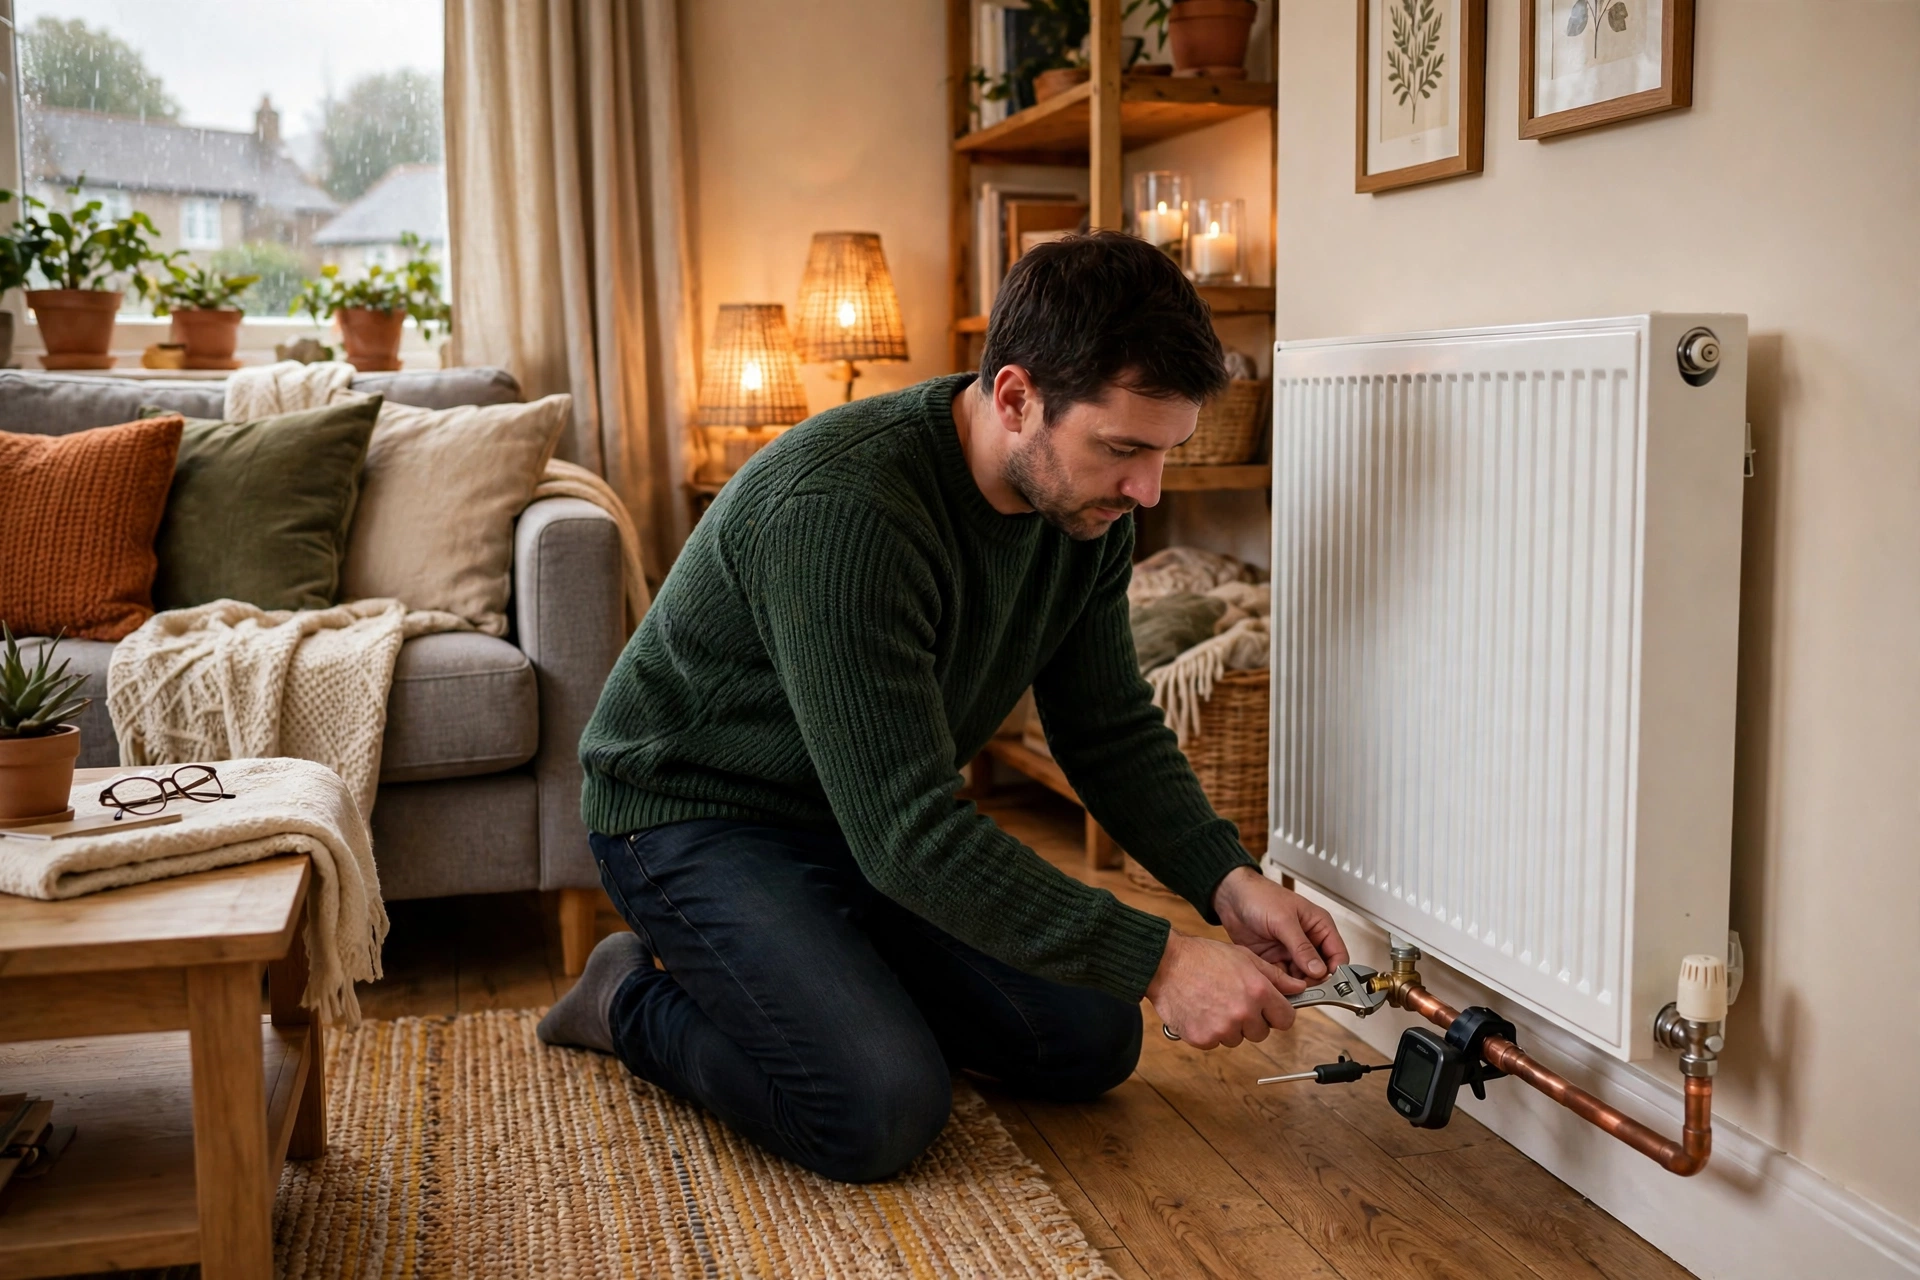
Some radiators in your home get hot quickly, others take an age, and one room always seems colder than the rest no matter where you set the thermostat. The boiler is working, the radiators are not leaking, and nothing looks broken. In many UK homes, that pattern has a single cause, and it is not a fault at all. The system is out of balance.
Balancing a radiator system means adjusting how much hot water each radiator receives, so that every radiator heats up at the right rate for its position in the system. Radiators near the boiler naturally get hot water first. If nothing holds them back, they take more than their share of the flow, and radiators further away are left with what remains. The result is a house where the rooms nearest the boiler are warm while the far bedroom or the extension stays lukewarm, and the thermostat, which usually sits in one room, gets a misleading picture of the whole house. Balancing fixes that by restricting the radiators that heat too fast, so the water has to travel further and reach the radiators at the end of the run.
It is a methodical job rather than a technical one. You need no plumbing qualifications, you do not drain the system, and you do not touch the boiler itself. What you do need is patience, because the system needs time to settle after each adjustment, and a willingness to work through the house radiator by radiator, in order. This guide follows the job in the order a heating engineer would do it: the symptoms balancing fixes and the symptoms it does not, what you need, the bleed-first step that must come before balancing, the lockshield method room by room, how to check the result, and what to do when a radiator is still cold afterwards.
Symptoms This Fixes (and What It Will Not)
Balancing is the right fix when the pattern is uneven heating across the house, rather than one radiator that is faulty on its own. The classic signs are easy to recognise. Radiators near the boiler heat up quickly and get fully hot, while radiators further away heat slowly or never quite get as hot. One or two rooms are always cooler than the rest, even when the heating has been on for an hour. The thermostat room is comfortable, but rooms further from the boiler are not, so you turn the thermostat up and the near rooms overheat while the far rooms only just catch up. Radiators that heat unevenly from one end to the other, hot at the flow end and cooler at the return end, can also be a balancing symptom, because too much or too little water is passing through them.
It is important to be clear about what balancing will not fix, because doing the job on the wrong fault wastes an afternoon and leaves the real problem untouched. Balancing will not fix a radiator that is cold at the top and warm at the bottom. That is trapped air, and it needs bleeding, not balancing. It will not fix a radiator that is cold at the bottom and warm at the top. That usually means sludge, a build-up of rust and debris inside the radiator that restricts water flow at the bottom, and it needs a professional clean, not a valve adjustment. It will not fix a radiator that is completely cold while the rest of the system is hot, which points to a stuck valve, a closed valve, or a blockage in that radiator’s pipework. It will not fix a boiler that keeps losing pressure, a pump that has failed, or a system where the boiler itself is undersized for the house. And it will not fix a room that is cold because it is poorly insulated, draughty, or has a radiator that is simply too small for the space. In each of those cases, balancing may make a small difference, but it will not solve the problem, and the last section of this guide explains how to tell which of these you are dealing with.
Before you start, do one quick diagnostic. Turn the heating on, let it run until the radiators are fully hot, and walk through the house noting which radiators heat first and which heat last. If the pattern is a clear gradient, nearest the boiler first and furthest last, with the far radiators noticeably slower or cooler, balancing is very likely to help. If every radiator heats at roughly the same rate but one room is still cold, look at insulation, draughts and radiator size before you touch a valve. If one radiator behaves completely differently from all the others, cold top, cold bottom, or completely cold, treat that radiator as a separate fault first, using the diagnosis in the final section.
What You Need
You need very little, and most of it is probably already in the house. The essential tools are a small adjustable spanner or a lockshield valve adjuster, a radiator bleed key, a pen and paper, and a cloth. The spanner turns the lockshield valve spindle, which is a small square or flat-ended metal stem under a plastic cap. A dedicated lockshield adjuster does the same job and fits the spindle more neatly, but an adjustable spanner works perfectly well. The bleed key is for the bleed-first step in the next section. The pen and paper matter more than they sound: you will be recording the order in which radiators heat up, and the number of turns each lockshield valve takes to close, and you will need those notes when you come back to a radiator an hour later.
A thermometer makes the job more accurate, but it is not essential. The most useful type is a digital clip-on pipe thermometer, which clamps onto the copper pipework at each radiator and gives a steady reading. A contactless infrared thermometer also works, though readings from shiny copper pipe can be less reliable, so a clip-on thermometer is the better choice if you are buying one. UK guides checked in November 2026 put a digital thermometer at around £10 to £15, which is the only purchase most people need for this job. If you do not have one, you can still balance the system by touch, using the method described in the lockshield section, and the result will be a clear improvement even if it is less precise than a thermometer reading.
You also need time. UK guides checked in November 2026 put the job at 2 to 4 hours for an average three-bedroom home with 8 to 10 radiators, and some put a professional visit at up to half a day. That is not because any single adjustment takes long. It is because the system needs 15 to 20 minutes to settle after each round of adjustments before you can judge the result, and there will be several rounds. Pick a day when you can leave the heating running and walk around the house undisturbed, and do not start late in the evening when you will be tempted to rush the settling time.
One safety note before you begin. You will be working on hot pipework, so keep your hands clear of pipes that have just heated up, and use the cloth to protect your fingers when you first touch a valve. You are not opening the system, draining water, or touching anything gas-related, so there is no gas safety issue in balancing itself. If your system is electric rather than a wet central heating system, if it is a communal heat network, or if any radiator is unfamiliar, check the manufacturer’s instructions first. Electric radiators must not be bled or balanced in this way, because they contain no circulating water to balance.
Bleed First
Bleeding and balancing are different jobs, and confusing them is the most common reason a balancing attempt fails. Bleeding removes trapped air from a radiator. Balancing controls how much water flows through it. Air in a radiator gives false readings, because a radiator full of air at the top cannot heat evenly no matter how its valves are set, and it will look like a balancing problem when it is not. So bleed every radiator before you balance, even radiators that seem fine, because a small amount of trapped air can distort the heat-up order you are about to record.
The method is straightforward, and our guide to how to bleed a radiator covers it in full. In brief: turn the heating off and let the radiators cool, hold a cloth under the bleed valve at the top corner of the radiator, turn the bleed key slowly anticlockwise until you hear air hissing out, and close the valve clockwise as soon as water trickles out steadily. Work through every radiator in the house, not just the ones that feel cold at the top, because the point here is a clean baseline, not a repair. When you have finished, check the boiler pressure gauge. Bleeding releases a small amount of water from the system, which can drop the pressure, and most UK systems run at around 1 to 1.5 bar when cold. If the gauge has fallen below the manufacturer’s recommended range, top the system up using the filling loop, following your boiler’s instructions, before you start balancing. A system that is low on pressure will not balance properly, because the pump cannot circulate water evenly when the pressure is too low.
Once every radiator is bled and the pressure is correct, you have a clean starting point. Do not skip this step because the radiators “seem fine”. A radiator can hold a small pocket of air without being obviously cold at the top, and that pocket will still throw off your temperature readings. Bleeding first takes half an hour at most, and it removes the single biggest source of false results in the whole job.
The Lockshield Method Room by Room
Every radiator has two valves, and understanding which is which is the whole job. On one side is the control valve you use every day. On a modern radiator this is usually a thermostatic radiator valve, or TRV, with numbered settings from 1 to 5, or a manual handwheel valve. It controls the temperature of that room by opening and closing as the room warms up. On the other side is the lockshield valve, usually covered by a plain plastic cap with no numbers on it. Its job is to set how much water flows through that radiator, and it is not meant to be adjusted day to day. That is why balancing uses the lockshield side. If you try to balance using the TRV or handwheel, the settings can be changed later without anyone realising, by a child turning a dial or a cleaner knocking a valve, and the system drifts straight back out of balance. The lockshield cap, once replaced, protects the setting you have made.
Start with the heating off and the system cool. Go to every radiator and remove the lockshield cap, which usually unscrews or pulls off by hand. Using your spanner, turn each lockshield spindle fully anticlockwise until it stops, so every lockshield valve is fully open. As you do this, note how many turns each valve takes to close again, by turning it clockwise until it stops and counting, then reopening it fully. Write that number down for each radiator. It is your reset point: if you get lost later, you can return every valve to fully open and start again, and it also tells you whether a valve was already nearly closed before you started, which is itself useful information.
Now set every TRV and manual control valve to its maximum setting, fully open. This takes the room thermostats out of the equation while you balance. If a TRV is left on a low setting, it will start closing as its room warms up, which restricts flow to that radiator for a reason that has nothing to do with balancing, and your readings will be meaningless. You will return the TRVs to their normal settings at the end, after the balance is set.
Turn the heating back on, with the thermostat set high enough that the system runs continuously, and walk through the house over the next 15 to 20 minutes, noting the order in which radiators heat up. The radiators closest to the boiler should heat first, and the furthest should heat last, but the actual order in your house is what matters, not the theory. Pipe runs do not always follow the obvious geography, and a radiator in a nearby room can be at the end of a long pipe run while a distant room sits on a short one. Write the order down as a numbered list, first to last, and note which radiators feel fully hot and which feel only lukewarm. This list is your balancing sequence. You will start with the first radiator on the list and work through to the last.
Now begin the adjustment, starting with the radiator that heated first. This radiator is getting too much flow at the expense of the rest of the system, so you are going to restrict it. Turn its lockshield valve fully clockwise until it is closed, then reopen it anticlockwise by just a quarter of a turn. That is the starting point for the nearest radiator. Do not open it further yet. Move to the second radiator on your list and give it slightly more opening than the first, a quarter turn plus a fraction more. Continue through the list in order, opening each lockshield valve slightly more than the previous one, until you reach the last radiator on the list, the furthest from the boiler, whose lockshield valve should be left fully open. The principle is simple: the nearer a radiator is to the boiler, the more you restrict it, so that water is forced to travel further and reach the radiators at the end of the run.
If you have a thermometer, you can now refine each radiator to a target rather than relying on the quarter-turn progression alone. Clip the thermometer to the flow pipe, the pipe bringing hot water into the radiator on the control valve side, and note the temperature. Then clip it to the return pipe, the pipe leaving the radiator on the lockshield side, and note that temperature. The difference between the two is the temperature drop across the radiator, and UK guides consistently put the target at 11 to 12 degrees C. That drop means the radiator is extracting roughly the right amount of heat from the water as it passes through. If the drop is less than 11 degrees, the water is passing through too quickly and the radiator is not giving up enough heat, so close the lockshield valve slightly and check again after a few minutes. If the drop is more than 12 degrees, the water is passing through too slowly, so open the lockshield valve slightly. Work through the radiators in your sequence order, one at a time, allowing a few minutes for each reading to settle after an adjustment. Do not chase the number to the decimal point. A drop of 11 to 12 degrees is the target, but a radiator sitting at 10 or 13 degrees after balancing is still a large improvement on an unbalanced system, and small variations between radiators are normal.
If you do not have a thermometer, use the touch method, which is the same quarter-turn progression described above, refined by feel. After your first pass, let the system run for 20 minutes, then walk through the house and feel each radiator from top to bottom and from the flow end to the return end. A well-balanced radiator should feel evenly warm across its whole surface, with the flow end slightly warmer than the return end. A radiator that is hot at the flow end and cool at the return end is getting too little flow, so open its lockshield valve a fraction. A radiator that is fully hot very quickly while others are still warming up is getting too much flow, so close its lockshield valve a fraction. Make small adjustments, a fraction of a turn at a time, and allow the system to settle before judging again. It usually takes two or three rounds of small adjustments to get a noticeable improvement, and that is normal. The temptation to make large adjustments to speed things up is the main cause of overshooting, where a radiator that was too hot becomes too cold and you end up chasing the balance back and forth.
When you are satisfied, replace every lockshield cap. This is not cosmetic. The cap protects the setting from being knocked, and it signals to anyone else in the house that this valve is not for everyday adjustment. Then return every TRV to its normal setting for that room. The system is now balanced at the lockshield valves, and the TRVs can do their normal job of controlling individual room temperatures on top of that balance, without undoing it.
Checking the Result
Give the system a full heating cycle before you judge the result. Turn the heating off, let the radiators cool completely, and then turn it back on the next morning, or at least after a proper cool-down, and walk through the house as it warms up. This cold-start test is the honest check, because a system that has been running all day can feel even when it is not balanced, simply because every radiator has had hours to catch up. On a cold start, a balanced system should show radiators warming up much more evenly than before, with far less difference between the first and last radiators to heat, and rooms reaching a comfortable temperature at roughly the same time.
Check three things on that cold start. First, the heat-up order: the gap between the first and last radiators to feel warm should be noticeably smaller than it was before balancing. Second, the evenness of each radiator: run your hand across each radiator from the flow end to the return end and from top to bottom, and look for a radiator that is still hot at one end and cool at the other, which suggests its lockshield setting still needs a small adjustment. Third, the rooms: sit in the rooms that were previously cold and see whether they now reach a comfortable temperature without the thermostat room overheating. If all three have improved, the balance has worked, even if the improvement is not perfect. Balancing is about even distribution, not about making every radiator identical, and a system with radiators of different sizes in rooms of different sizes will never heat in perfect lockstep.
If the result is only partly improved, do one more round of small adjustments on the radiators that are still out of step, using the same method, and then repeat the cold-start test. If the result is no better at all, or if the pattern has changed but not improved, stop and reconsider the diagnosis. A system that does not respond to balancing at all usually has a different fault, which is the subject of the next section. Do not keep adjusting in the hope that a fourth or fifth round will fix what three rounds have not. At that point, the valves are not the problem.
One final check is worth doing a week later. Live with the balanced settings for a few days of normal heating, with TRVs at their usual settings, and note whether any room has drifted back to being cold. A setting that holds for a week is a good balance. A radiator that needs its lockshield valve reopened every few days may have a valve that is not holding its position, in which case the valve itself may need replacing, and that is a job for a heating engineer rather than a further adjustment.
Still Cold? (Sludge, Pump, TRVs)
If a radiator is still cold after bleeding and balancing, the fault is elsewhere, and each pattern points to a different cause. Work through them in order, cheapest and simplest first.
Start with the pattern of the coldness. If the radiator is cold at the bottom and warm at the top, the usual cause is sludge. Over years, rust and debris settle inside radiators and pipework, and the sludge collects at the bottom of the radiator, where it blocks water flow. Bleeding will not fix it, because the problem is not air, and balancing will not fix it, because the problem is not flow distribution across the system. It is a blockage inside that radiator. The fix is a powerflush, where a heating engineer flushes the whole system with a pump and cleaning chemicals to clear the debris, and it is a professional job, not a DIY one. Powerflushing is mentioned here only as the correct next step, not as a DIY instruction. If several radiators are cold at the bottom, sludge is even more likely, and the system as a whole needs attention rather than one radiator.
If the radiator is completely cold while the rest of the system is hot, check the valves first. Make sure both valves on that radiator are open, and that the TRV is not stuck closed. TRVs can seize after a summer of inactivity, especially older ones, and a stuck TRV pin, the small pin under the thermostatic head, is a common cause of a single cold radiator. With the heating off and the radiator cool, remove the TRV head, which usually unscrews by hand, and check whether the pin moves freely when pressed. If it is stuck down, gentle movement with pliers may free it, but do not force it, and if the pin does not move at all, the valve needs replacing. Also check that the lockshield valve on that radiator has not been closed accidentally, or left closed from your balancing pass, and reopen it to the setting from your notes. If both valves are open and the radiator is still completely cold, there may be a blockage in its pipework, and that needs a heating engineer.
If the whole system is slow to heat, or all radiators are lukewarm, look at the pump and the boiler. The circulation pump pushes water around the system, and if it is failing, set too low, or clogged with debris, no amount of valve adjustment will distribute heat evenly, because the water is not moving fast enough to reach the far radiators in the first place. Signs of a pump problem include radiators that are slow everywhere, a boiler that cycles on and off frequently, and unusual noises from near the boiler. Pump speed settings and pump replacement are heating engineer territory, because the pump sits inside the boiler casing on many modern boilers, and opening a boiler casing is not a DIY job. Similarly, if the boiler itself is undersized for the house, or if it is a type that struggles with your system layout, balancing can improve the distribution of the heat you have, but it cannot create heat the boiler is not producing. Our guide to the types of boiler explained covers combi, system and regular boilers and which properties each suits, and it is worth reading if you suspect the boiler, rather than the radiators, is the limiting factor.
If a room is still cold even though its radiator is fully hot and evenly warm, the problem is not the heating system at all. It is heat loss. The room may be poorly insulated, draughty around windows and doors, or served by a radiator that is too small for the room’s size and heat demand. Balancing cannot fix heat loss, because the radiator is already giving out all the heat it can, and that heat is escaping faster than it is replaced. In that case, the next steps are insulation, draught-proofing, and checking radiator sizing, not further valve adjustments. A heating engineer can calculate the heat output a room needs, in British thermal units or kilowatts, and compare it with the radiator fitted, which settles the sizing question quickly.
Finally, consider cost and timing if you decide to hand the job to a professional instead. UK guides checked in November 2026 put professional balancing at roughly £80 to £200 for a typical home, with some guides putting it at £100 to £250 for larger systems, and a visit taking up to half a day. DIY balancing costs nothing beyond a thermometer at around £10 to £15 if you buy one, and 2 to 4 hours of your time for an average home. A professional visit is worth it if you have tried the method above and the system has not responded, if several radiators are cold at the bottom and need a powerflush assessment, or if you suspect a pump or boiler fault. In those cases, you are no longer paying for balancing alone. You are paying for a diagnosis, and that diagnosis is what the DIY method cannot give you. If you do call an engineer, your notes from this job, the heat-up order, the lockshield turn counts, and which radiators stayed cold, are genuinely useful to them, so keep the piece of paper.
Frequently Asked Questions
How do I know if my radiators need balancing?
If radiators near the boiler heat quickly while radiators further away heat slowly or stay lukewarm, and some rooms are always colder than others, the system is probably out of balance. A cold-start test, watching the order in which radiators heat from cold, confirms it. If one radiator is cold at the top, it needs bleeding first. If it is cold at the bottom, it is more likely sludge than balancing.
What is the difference between bleeding and balancing a radiator?
Bleeding removes trapped air from a single radiator, which usually shows as cold at the top. Balancing adjusts the lockshield valves across the whole system so that hot water is shared evenly between all radiators. Bleed first, then balance, because air in a radiator gives false readings that make balancing impossible to judge.
Which valve do I adjust to balance a radiator?
The lockshield valve, on the opposite side of the radiator from the TRV or manual control valve, usually under a plain plastic cap. Do not balance using the TRV, because its setting can be changed later in everyday use and the balance will drift. Adjust the lockshield valve in small fractions of a turn, and replace the cap when you finish.
What temperature difference should I aim for across a radiator?
UK guides put the target flow-to-return drop at 11 to 12 degrees C, measured on the pipework at each end of the radiator. If the drop is smaller, close the lockshield valve slightly. If it is larger, open it slightly. Without a thermometer, use the touch method: work from the nearest radiator to the furthest, opening each lockshield valve slightly more than the previous one, with the furthest radiator fully open.
How long does it take to balance radiators?
UK guides checked in November 2026 put DIY balancing at 2 to 4 hours for an average three-bedroom home with 8 to 10 radiators, because the system needs 15 to 20 minutes to settle after each round of adjustments. A professional visit is often quoted at up to half a day. Do not rush the settling time, or you will be judging readings that have not stabilised.
Do I need to turn the TRVs fully up while balancing?
Yes. Set every TRV and manual control valve to maximum while you balance, so the room thermostats do not restrict flow and distort your readings. Return them to their normal settings only after the lockshield balance is set and the caps are replaced.
Why is my radiator still cold after balancing?
Check the pattern. Cold at the bottom usually means sludge, which needs a professional powerflush. Completely cold usually means a stuck or closed valve, especially a seized TRV pin. Slow heating everywhere can mean a pump fault or an undersized boiler. A radiator that is fully hot but a room that is still cold usually means heat loss through poor insulation or draughts, or a radiator that is too small for the room.
How much does it cost to have radiators balanced professionally?
As a typical guide range, roughly £80 to £200 for a standard home, with some guides putting larger systems at £100 to £250, according to UK guides checked in November 2026. These are guide ranges, not quotes. DIY balancing costs nothing beyond a thermometer at around £10 to £15 if you buy one. If balancing does not fix the problem, a professional visit is still worth it for the diagnosis, especially where sludge, a pump fault or a boiler issue is suspected.