
How to Paint a Front Door: A Step-by-Step UK Guide
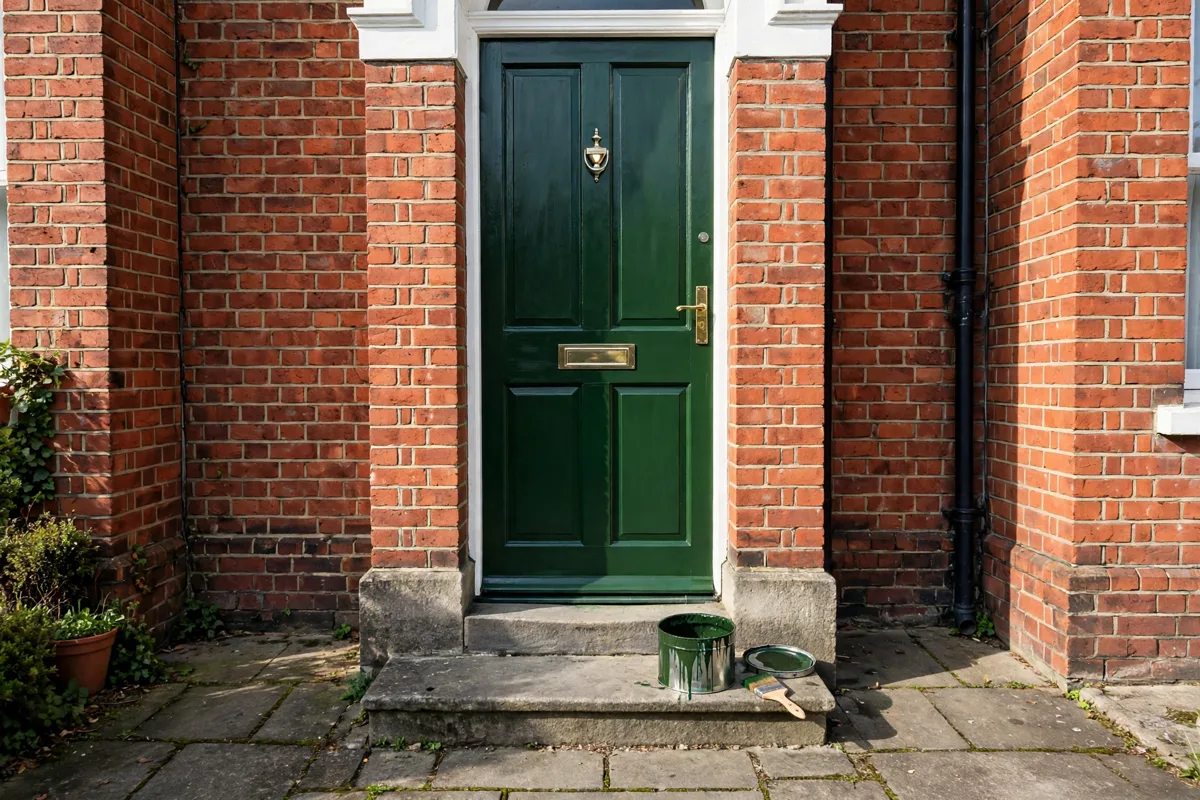
A front door takes more weather than any other painted surface on a house. Rain hits it sideways, sun bakes one face all afternoon, and it is opened and closed a dozen times a day. Paint it well and it looks new for years. Paint it badly and it peels within a winter, usually starting around the letterbox and the bottom rail where water sits.
The first decision is whether to do it yourself or pay someone. Doing it yourself costs about £50 in paint and materials, according to Doordeals. Hiring a professional costs £150 to £300 for one external door, depending on sanding, knotting, glass panels and coats: PriceYourJob puts a plain door at £150 and one with glass and sanding at £250, while MyJobQuote gives an average of about £200, with a plain composite door at £150 to £180 and up to £250 to £300 with glass and sanding. Labour typically runs £150 to £250 per day. A brand new front door costs £500 to £2,000, so painting is the cheap refresh either way. The honest answer depends on your door. A flat timber door with no glass is a straightforward weekend job. A composite or uPVC door needs the right primer and paint system, and a door with glass panels, knotting and old flaking paint takes longer than most first-timers expect. This guide covers all three door materials, so you can judge your own door before you buy a tin.
The job itself takes two to four hours of actual work, spread over two or three days while coats dry, according to MyJobQuote and PriceYourJob. Most of that time is preparation. The painting is the easy part. What follows is the order that works: prep by material, decide whether the door comes off, prime correctly, paint in the right order with thin coats, refit the hardware, then let it cure properly.
Prep by Door Material: Timber, uPVC and Composite
Every front door needs the same three prep steps, and then one step that depends on the material. First, clean the door. Wash it with warm water and a little washing-up liquid, or sugar soap for a grimy door, and let it dry fully. Paint will not stick to a greasy or dusty surface, and the bottom rail and the area around the handle collect the most grime. Second, fill any gaps, cracks and holes with exterior wood filler on timber, or a suitable exterior filler on other materials, and sand the filler flush when it is dry. Third, sand the whole door. The aim is not to strip it bare. It is to key the surface so the new paint has something to grip, and to remove any loose or flaking paint.
For a timber door, sand with 120-grit paper, working with the grain, then wipe the dust off with a damp cloth. If the old paint is flaking in patches, scrape the loose paint off first and feather the edges with sandpaper so the new coat does not show a step. Timber also needs knotting treatment. Knots in the wood leak resin that bleeds through paint as a brown stain, so dab knotting solution over every knot and let it dry before you prime. If your door has a lot of knots, this one step is the difference between a finish that lasts and one that stains within months.
For a uPVC door, the prep is different because the surface is smooth plastic, not wood. Wash it thoroughly, then sand it lightly with fine 240-grit paper, just enough to dull the shine. You are not trying to remove material. You are giving the primer a key. Wipe it down with a cloth dampened with white spirit or a uPVC cleaner afterwards to remove dust and any silicone residue, which is the usual reason paint peels off uPVC. Do not use a coarse sandpaper on uPVC. Deep scratches show through the topcoat. If your uPVC door is sticking or catching after years of use, sort that first. Our guide to how to fix a sticking uPVC door covers the hinge and alignment fixes, and a door that does not close properly will chip its new paint within weeks.
For a composite door, treat it like uPVC. Composite doors have a smooth skin, often with a wood-grain texture pressed into it. Clean it well, sand lightly with fine paper, and wipe it down. Check the door for any damage to the skin first. A composite door with a cracked or delaminating skin is not a painting job. It needs the manufacturer or a specialist, because paint will not fix a failing surface.
One rule applies to all three materials. Do not paint over locks, letterbox edges and hinges. Mask them or, better, take the hardware off, which is covered in its own section below. Paint built up around a lock or a letterbox looks careless and makes the hardware stiff. The same goes for the rubber draught seals around the frame. Mask them or leave a clean line, because paint on a seal stops it sealing.
Do You Need to Take the Door Off?
No. You do not need to take a front door off its hinges to paint it, and for most homeowners it is better not to. Painting the door in place, on its hinges, is the standard method in every UK guide checked for this article, and it avoids the two risks of removing it: the door is heavy and awkward to carry without help, and a door left off overnight leaves your home unsecured.
Painting in place works if you can open the door wide and keep it open while each coat dries. Open it fully, wedge it so it cannot swing in the wind, and work on one face at a time. Paint the outside face first, let it dry to the point where it is touch dry, then close the door gently and paint the inside face. A small block of wood wedged under the door, or a doorstop, stops it moving while you work. The edges of the door are painted while it is open, with the brush reaching around the edge.
There are two situations where taking the door off is worth it. The first is a door with a lot of glass panels or intricate mouldings, where painting flat on trestles is genuinely faster and neater. The second is a door that needs heavy stripping, because paint stripper and sanding dust are easier to manage outside. If you do take it off, have a second person to help lift it, label the hinges so the door goes back on the same way, and never leave the opening unsecured overnight. A sheet of plywood screwed over the opening is the minimum, and it is still not a front door.
If you paint in place, plan around the weather and the household. The door needs to stay open for hours after each coat, so pick a mild, dry day, ideally in late spring or early summer, and tell everyone in the house that the front door will be open. Do not start in the late afternoon in autumn. A coat that is still tacky when the evening damp arrives will stay soft, pick up dust, and may stick to the frame when the door is closed for the night.
Primer Rules: When You Need One and Which Type
Primer is the step that first-timers most often skip, and it is the step that decides whether the paint lasts two years or ten. Primer does three jobs. It seals the surface, it gives the topcoat something to grip, and on timber it blocks stains from knots and tannin. Whether you need it, and which type, depends on the door material and what is already on it.
On bare timber, primer is not optional. Use an exterior wood primer, applied after the knotting solution has dried. One coat is usually enough on a sound door. On previously painted timber in good condition, where the old paint is sound and you have sanded it to a key, a primer is still recommended if you are changing colour dramatically, for example from dark green to white, because it stops the old colour showing through. If you are repainting the same colour over sound paint, you can often go straight to an undercoat, but a primer coat costs one extra hour and buys insurance against peeling.
On uPVC and composite doors, the primer matters more than the topcoat. Standard wood primer will not bond to plastic. You need a primer made for uPVC, or a multi-surface primer that states on the tin that it is suitable for uPVC and plastic. Apply it thinly and evenly, and let it dry fully before the topcoat. This is the step that decides whether paint sticks to a uPVC door or peels off in sheets the following winter. Buy the primer and the topcoat as a system from the same brand where possible, because the manufacturer has tested them together.
There are two things to avoid. Do not use interior emulsion on a front door, under any circumstances. It is not made for weather, it will wash off in rain, and it will crack in frost. Use an exterior paint system: primer, undercoat and topcoat, all rated for exterior use. And do not use a primer that is not rated for the material. A wood primer on uPVC is wasted money, because it will not bond, and a uPVC primer on bare timber will not seal the wood properly.
Let the primer dry for the time stated on the tin, not less. Water-based primers are usually ready to overcoat in two to four hours in mild weather. Oil-based primers take longer, often overnight. If you paint over a primer that is still soft, the topcoat will drag and wrinkle. A light sand with fine paper between primer and topcoat, followed by a wipe down, removes any dust nibs and gives a smoother finish.
Painting Order and Coats
The order you paint a front door in matters, because it decides where the brush marks land and whether drips show. The rule is to paint the details first and the flat areas last, and to work from the top of the door downwards, so any drips fall onto paint that has not yet been finished.
Start with the panels, if your door has them. Paint the recessed panels first, using a brush to get into the corners and edges, then the raised mouldings around them. Next, paint the stiles, which are the vertical pieces of the door, then the rails, which are the horizontal pieces, working from the top rail down to the bottom rail. If the door is a flat slab with no panels, start at the top and work down in sections, keeping a wet edge so each new brushload blends into the last. Paint the edges of the door last, opening and closing it as needed, and wipe any paint off the hinges and the lock as you go.
Use two thin topcoats, never one thick coat. A thick coat takes far longer to dry, it sags and runs on a vertical surface, and it is more likely to crack as it cures. Two thin coats give a harder, more even finish and better weather protection. Doors2Floors recommends two topcoats as a minimum, and that matches every other guide checked. Let the first topcoat dry fully before the second. Water-based exterior paint is now the default for UK exterior joinery, and it is quick drying, stays white rather than yellowing, and cleans up with water. Oil-based paint gives a harder finish but takes longer to dry and yellows over time, especially in white.
Work out how much paint to buy before you start. A standard UK front door measures about 1981 by 762mm, which is roughly 1.5 square metres per face, according to Doors2Floors. Exterior paint covers 12 to 16 square metres per litre per coat, so one litre gives two coats on both faces of a standard door with a little spare. Buy one tin, and buy it all in one batch, so the colour matches. A second tin bought later from a different batch can be a slightly different shade, which shows on a front door.
Choose your brushes carefully. A good quality 50mm synthetic brush is the right tool for most of a front door. Cheap brushes shed bristles into the paint, and a brush that is too large is hard to control around panels and hardware. A small foam roller can speed up the flat areas of a slab door, but it leaves a stippled texture that looks wrong on a panelled door, so use a brush for panelled doors. Keep a damp cloth nearby for wiping drips and mistakes while the paint is still wet.
Paint in mild weather. The ideal conditions are a dry day between 10 and 20 degrees, with no rain forecast for at least six hours after the last coat. Do not paint in direct hot sun, because the paint dries too fast on the surface and leaves brush marks, and do not paint when it is cold or damp, because the paint will stay tacky and may not cure properly. If rain is forecast within a few hours, stop and wait for a better day. A front door is not a job to rush.
Hardware Off and On Again
Removing the hardware before you paint is the single easiest way to make the job look professional. A door painted with the letterbox, knocker, handle and lock still in place will have paint on the edges of every fitting, and the fittings will be stiff afterwards. Taking them off takes twenty minutes and saves hours of careful cutting in.
Remove the letterbox, the knocker, the handle, the escutcheon around the keyhole, and the door number if it is screwed on. Put the screws in a labelled bag or a small tub so nothing gets lost, and photograph the fittings before you remove them so you know which way round they go back. If a screw is seized, a drop of penetrating oil and ten minutes of patience will usually free it. Do not force it. A sheared screw in a front door is a job for a locksmith.
With the hardware off, paint the door without any obstacles, and paint right up to the edges of the holes where the fittings sit. Let the paint cure before you refit anything. The fittings go back on after the final coat has dried, not while it is still tacky, or the paint will stick to the back of the fitting and peel off when the fitting is next removed. If the paint has built up in the screw holes, clear it with the tip of a screwdriver before you refit.
This is also the right time to look at the lock. A front door repaint is a natural moment to check that the lock, the hinges and the letterbox are all in good order, because you are handling them anyway. If the lock is stiff or the door has a security weakness, our guide to front door security covers locks, hinges and the simple upgrades that make a real difference. Do not paint over a lock that needs replacing. Replace it first, then paint around the new fitting.
If you are keeping the same hardware, clean it while it is off. Brass fittings come up well with a proper brass cleaner, and a chrome handle just needs a wipe. Do not paint the hardware to match the door unless you are using a paint made for metal. Ordinary exterior paint on a handle will wear off within weeks where hands grip it.
Cure Care: Drying Times and the First Weeks
Paint that is dry to the touch is not cured. Drying and curing are different things, and confusing them is the most common reason a freshly painted front door gets damaged in its first week. Touch dry means the surface no longer feels wet. Cured means the paint film has fully hardened through, and that takes much longer.
Water-based exterior paint is usually touch dry in one to two hours in mild weather, and ready to overcoat in about four hours. Oil-based paint takes four to six hours to become touch dry and often needs overnight before the next coat. Curing takes longer for both types: allow at least a week, and up to two weeks in cold or damp weather, before the paint reaches full hardness. During that time, treat the door gently. Do not slam it, do not let the post push letters through a still-soft letterbox surround, and do not stick anything to the paint.
Keep the door open for several hours after the final coat, until it is properly touch dry. If you have to close it before then, stick a strip of masking tape along the edge where the door meets the frame, or slip a piece of thin card between the door and the weather seal, so the paint does not stick to the frame and peel off when the door is next opened. This is the single most common cause of damage to a newly painted door, and it is easy to prevent.
For the first few weeks, avoid cleaning the door. Let the paint cure fully before you wash it. After that, a wash with warm soapy water once or twice a year keeps it looking fresh, and a quick check each autumn for chips and cracks lets you touch them up before winter water gets underneath the paint. A small chip touched up promptly is a five-minute job. The same chip left through a winter becomes a patch of peeling paint that needs sanding and repainting.
A freshly painted front door is one of the cheapest ways to change how a house looks from the street, and it is a genuine improvement to the value of the property. Our guide to raising your home’s value with a fresh coat of paint puts door and exterior paint in context with the other cheap jobs that make a difference. Done properly, with the right prep for the material, the right primer, two thin coats and a proper cure, a painted front door should last five to ten years before it needs doing again. Done in a rush, with one thick coat over dirty paint, it will peel by the first frost.
Frequently Asked Questions
Can you paint a uPVC front door?
Yes, but only with the right system. Wash it, sand it lightly with fine 240-grit paper to dull the shine, wipe it down, then use a primer made for uPVC or a multi-surface primer that states it is suitable for plastic, followed by an exterior topcoat. Standard wood primer will not bond to uPVC and the paint will peel. Do not use interior emulsion.
Can you paint a composite front door?
Yes, in the same way as uPVC. Composite doors have a smooth skin, so clean it well, sand lightly with fine paper, prime with a uPVC or multi-surface primer, and topcoat with exterior paint. Check the skin for cracks or delamination first. A damaged composite skin is not a painting job and needs a specialist.
Do I need to sand a front door before painting?
Yes. Sanding keys the surface so the new paint grips. On timber, use 120-grit paper and work with the grain. On uPVC and composite, use fine 240-grit paper, just enough to dull the shine. Always remove loose or flaking paint first, and wipe the dust off before you prime.
How long does paint take to dry on a front door?
Water-based exterior paint is usually touch dry in one to two hours and ready to overcoat in about four hours, in mild weather. Oil-based paint takes four to six hours to become touch dry and often needs overnight. Full curing takes one to two weeks. Keep the door open until it is touch dry, and treat it gently while it cures.
Can I paint my front door without taking it off the hinges?
Yes. Painting the door in place, on its hinges, is the standard method. Open it wide, wedge it so it cannot swing, paint one face, let it dry, then paint the other. Taking it off is only worth it for a door with many glass panels or one that needs heavy stripping, and you must never leave the opening unsecured overnight.
How much does it cost to paint a front door in the UK?
Doing it yourself costs about £50 in paint and materials. Hiring a professional costs £150 to £300, depending on sanding, knotting, glass panels and coats, with an average of about £200 according to MyJobQuote. Labour is typically £150 to £250 per day. A new front door costs £500 to £2,000, so painting is the cheaper refresh.
What is the best paint for a front door?
A water-based exterior paint system: a primer suited to the door material, an undercoat, and two thin topcoats of exterior paint. Water-based paint is now the default for UK exterior joinery, it stays white, dries quickly and cleans up with water. Never use interior emulsion on a front door.